


 Damage
  Loss
Loss  Theft
Theft 


Ductless Mini-Split Installation: Everything You Need to Know
Why Ductless Mini-Splits Are Taking Over
Homeowners across the country are making the switch to ductless mini-split systems — and for good reason. These sleek, energy-efficient units deliver powerful heating and cooling without the mess of ductwork, making them ideal for garages, additions, backyard studios, and whole-home comfort upgrades.
Whether you're retrofitting an older home, conditioning a brand-new space, or simply tired of inflated energy bills, a mini-split system offers a smarter, cleaner, and more controllable solution. Modern units can cool in summer, heat in winter, and even dehumidify — all from a single compact installation.
Cost
Units range from under $700 for single-zone to $5,000+ for multi-zone systems. Professional installation adds $500–$2,000 depending on complexity and region.
Central Air vs. Ductless
Central systems require extensive ductwork and higher upfront costs. Mini-splits are faster to install, more efficient by zone, and better suited for targeted comfort areas.
Zoned Comfort
Each indoor unit operates independently. Control temperatures room by room — no more fighting over the thermostat or cooling empty spaces.
Installation Time
A professional single-zone installation typically takes 4–8 hours. Multi-zone systems or challenging layouts may require a full day or more.
Typical Costs and Potential Savings
Choosing the right BTU rating is critical. An undersized system will struggle on hot days; an oversized system short-cycles and wastes energy. Use this quick reference to match your space to the right output level.
| Space Size (sq ft) | Recommended BTU | Approx. Unit Cost | Est. Annual Savings |
|---|---|---|---|
| Up to 300 | 9,000 BTU | $600 – $900 | $80 – $140/yr |
| 300 – 500 | 12,000 BTU | $700 – $1,100 | $100 – $180/yr |
| 500 – 800 | 18,000 BTU | $900 – $1,500 | $140 – $240/yr |
| 800 – 1,200 | 24,000 BTU | $1,200 – $2,200 | $180 – $320/yr |
| 1,200 – 1,800 | 36,000 BTU | $1,800 – $3,500 | $260 – $450/yr |
Always factor in ceiling height, insulation quality, sun exposure, and local climate when sizing your system. When in doubt, consult a licensed HVAC technician for a proper load calculation.
The Great Debate: DIY vs. Professional Installation
This is one of the most common questions homeowners ask before purchasing a mini-split. The honest answer? It depends on your skills, local regulations, and how comfortable you are working with refrigerant lines and electrical panels. Here's a side-by-side breakdown to help you decide.
DIY Installation
- Saves $500–$2,000 in labor costs
- Best for single-zone "mini-split in a box" kits with pre-charged lines
- Requires basic electrical and drilling skills
- May void warranty if not certified
- Check local permit and code requirements first
- Suitable for garages, sheds, and accessory buildings
Professional Installation
- EPA 608 certification required for refrigerant handling
- Ensures correct sizing, placement, and commissioning
- Protects your warranty and insurance coverage
- Required for multi-zone and concealed duct systems
- Faster completion with professional-grade tools
- Recommended for primary living spaces and whole-home systems
If your mini-split uses a pre-charged "DIY-friendly" line set and you're installing in a non-primary space like a garage or workshop, going DIY is a viable option. For anything more complex — including concealed duct systems like the Senville AURA — professional installation is strongly advised.
When to Hire a Professional Installer
Some situations simply call for expert hands. Below are the key scenarios where hiring a licensed HVAC technician is not just recommended — it's essential for safety, performance, and code compliance.
Complex multi-room systems — Multiple indoor units require careful refrigerant line routing, load balancing, and electrical panel coordination.
Permit-required jurisdictions — Many municipalities require licensed contractors to pull permits for HVAC work. Always check before starting.
Refrigerant handling — Working with R-410A or R-32 refrigerant requires EPA 608 certification. It is illegal to vent refrigerant into the atmosphere.
Concealed duct or ceiling cassette units — These require precise ductwork, drain routing, and structural considerations best handled by professionals.
Warranty protection — Most manufacturers require professional installation to validate the product warranty, especially for premium systems.
Electrical panel upgrades — Larger systems may require a new dedicated circuit breaker. Panel work must be done by a licensed electrician.
Benefits of Ductless Mini-Split Systems
Beyond convenience, ductless systems offer a compelling set of technical and lifestyle advantages that make them one of the smartest home comfort investments you can make today.
Energy Efficiency
Inverter-driven compressors adjust output in real time, reducing electricity consumption by up to 40% vs. traditional systems.
No Ductwork Needed
Ideal for older homes, additions, garages, and outbuildings where running ducts would be costly or impractical.
Ultra-Quiet Operation
Indoor units operate as quietly as 19 dB — whisper quiet — making them perfect for bedrooms, home offices, and studios.
Year-Round Comfort
Heat pump functionality provides efficient heating even in temperatures as low as -13°F, eliminating the need for separate heating systems.
Smart Controls
Most modern mini-splits support Wi-Fi and app control, scheduling, sleep modes, and integration with smart home ecosystems.
Improved Air Quality
Built-in multi-stage filtration captures dust, allergens, mold spores, and bacteria — significantly improving indoor air quality.
Your Step-by-Step Ductless Mini-Split Installation Guide
Whether you're a confident DIYer or simply want to understand what a technician will be doing in your home, this step-by-step walkthrough covers the full installation process from start to finish.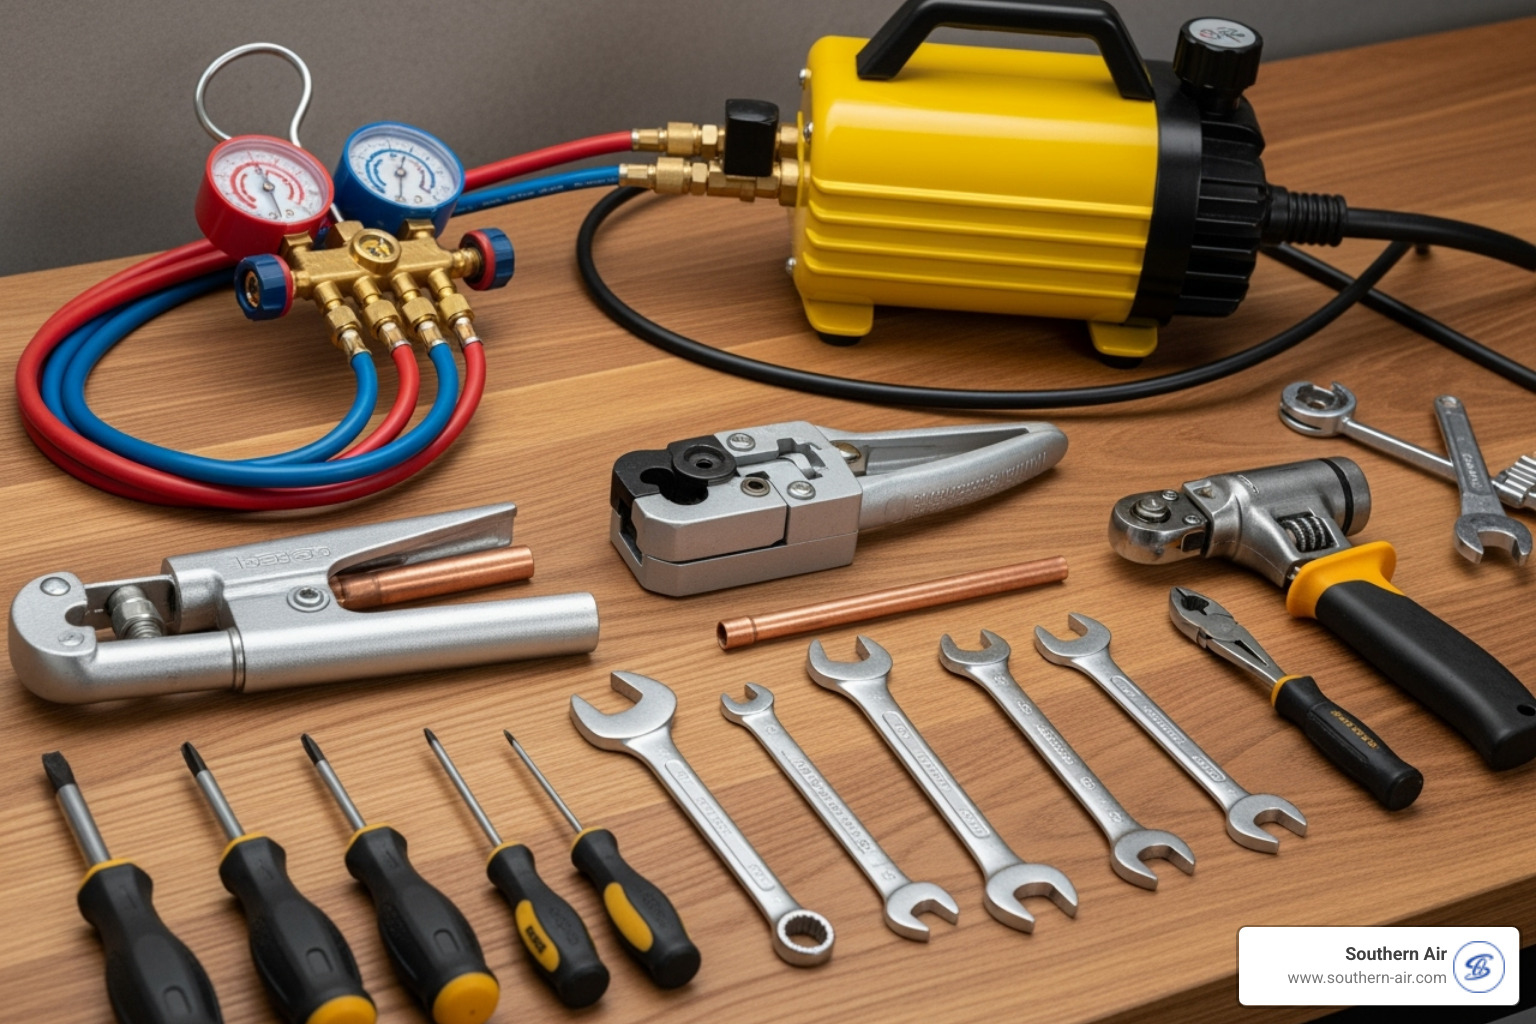
Preparation and Tools
Before anything else, gather your materials and review local building codes. A successful installation starts with thorough planning.
- Measure and mark indoor and outdoor unit locations
- Gather tools: drill, hole saw, level, pipe cutter, vacuum pump, manifold gauge set
- Verify electrical capacity at your panel for the required circuit
- Check local permit requirements before beginning work
Installing the Indoor Unit
The indoor air handler must be mounted level on a structurally sound wall with adequate clearance for airflow and service access.
- Locate wall studs or use appropriate wall anchors for the mounting plate
- Mount the backing plate level and securely — this supports the full weight of the unit
- Core a 3-inch hole through the wall at a slight downward angle for drainage
- Thread the refrigerant lines, drain hose, and communication cable through the hole
- Hang the indoor unit onto the mounting plate and connect all lines
Installing the Outdoor Unit
The condenser unit must be placed on a firm, level surface with sufficient clearance on all sides for airflow and serviceability.
- Use a concrete pad or heavy-duty wall brackets — never place directly on soil
- Maintain at least 12 inches of clearance on the air intake and exhaust sides
- Avoid locations exposed to direct rain runoff, falling debris, or snow drifts
- Run the line set from indoor unit to condenser, securing with UV-resistant line set cover
Connecting the System
Proper refrigerant line connections and electrical wiring are the most technically demanding steps. Errors here can cause system failure or safety hazards.
- Flare refrigerant line ends carefully — leaks here are the #1 cause of failed installs
- Connect the liquid and suction lines to the outdoor unit service ports
- Wire the communication cable between indoor and outdoor units per the wiring diagram
- Connect the dedicated electrical circuit to the outdoor disconnect box
- Vacuum the refrigerant lines to at least 500 microns before releasing refrigerant
Refrigerant handling requires EPA 608 certification. If your system is not a pre-charged DIY kit, do not attempt to release, recover, or recharge refrigerant yourself. Hire a certified HVAC technician for this step.
Keeping Your System Running at Peak Performance
A ductless mini-split is a low-maintenance system by design, but regular upkeep is essential to preserve efficiency, extend equipment life, and maintain healthy air quality in your home.
Monthly: Clean or rinse the indoor unit's washable filters. Dirty filters are the single most common cause of reduced airflow and cooling capacity.
Every season: Inspect the outdoor condenser coil for debris, leaves, or grass clippings. Clear at least 12 inches around the unit. Check drain lines on the indoor unit for blockages that can cause water damage.
Annually: Schedule a professional inspection to check refrigerant levels, electrical connections, coil condition, and overall system performance. Many manufacturers require annual servicing to maintain warranty validity.
Watch for warning signs: Reduced airflow, ice on the indoor coil, unusual sounds, water leaks, or a unit that runs constantly without reaching set temperature all indicate a service call is needed.
Ready to Upgrade Your Comfort?
The Senville AURA 24,000 BTU Concealed Duct Mini-Split is engineered for whole-home efficiency, whisper-quiet performance, and all-season reliability.
Senville AURA 24K BTU Mini Split