


 Damage
  Loss
Loss  Theft
Theft 


The Complete Guide to Wall-Mounted Dehumidifiers
In This Article
Part 1: How to Install a Wall-Mounted Dehumidifier • Part 2: Understanding Home Humidity & Dehumidifiers • Part 3: Preventing Corrosion in Your Dehumidifier
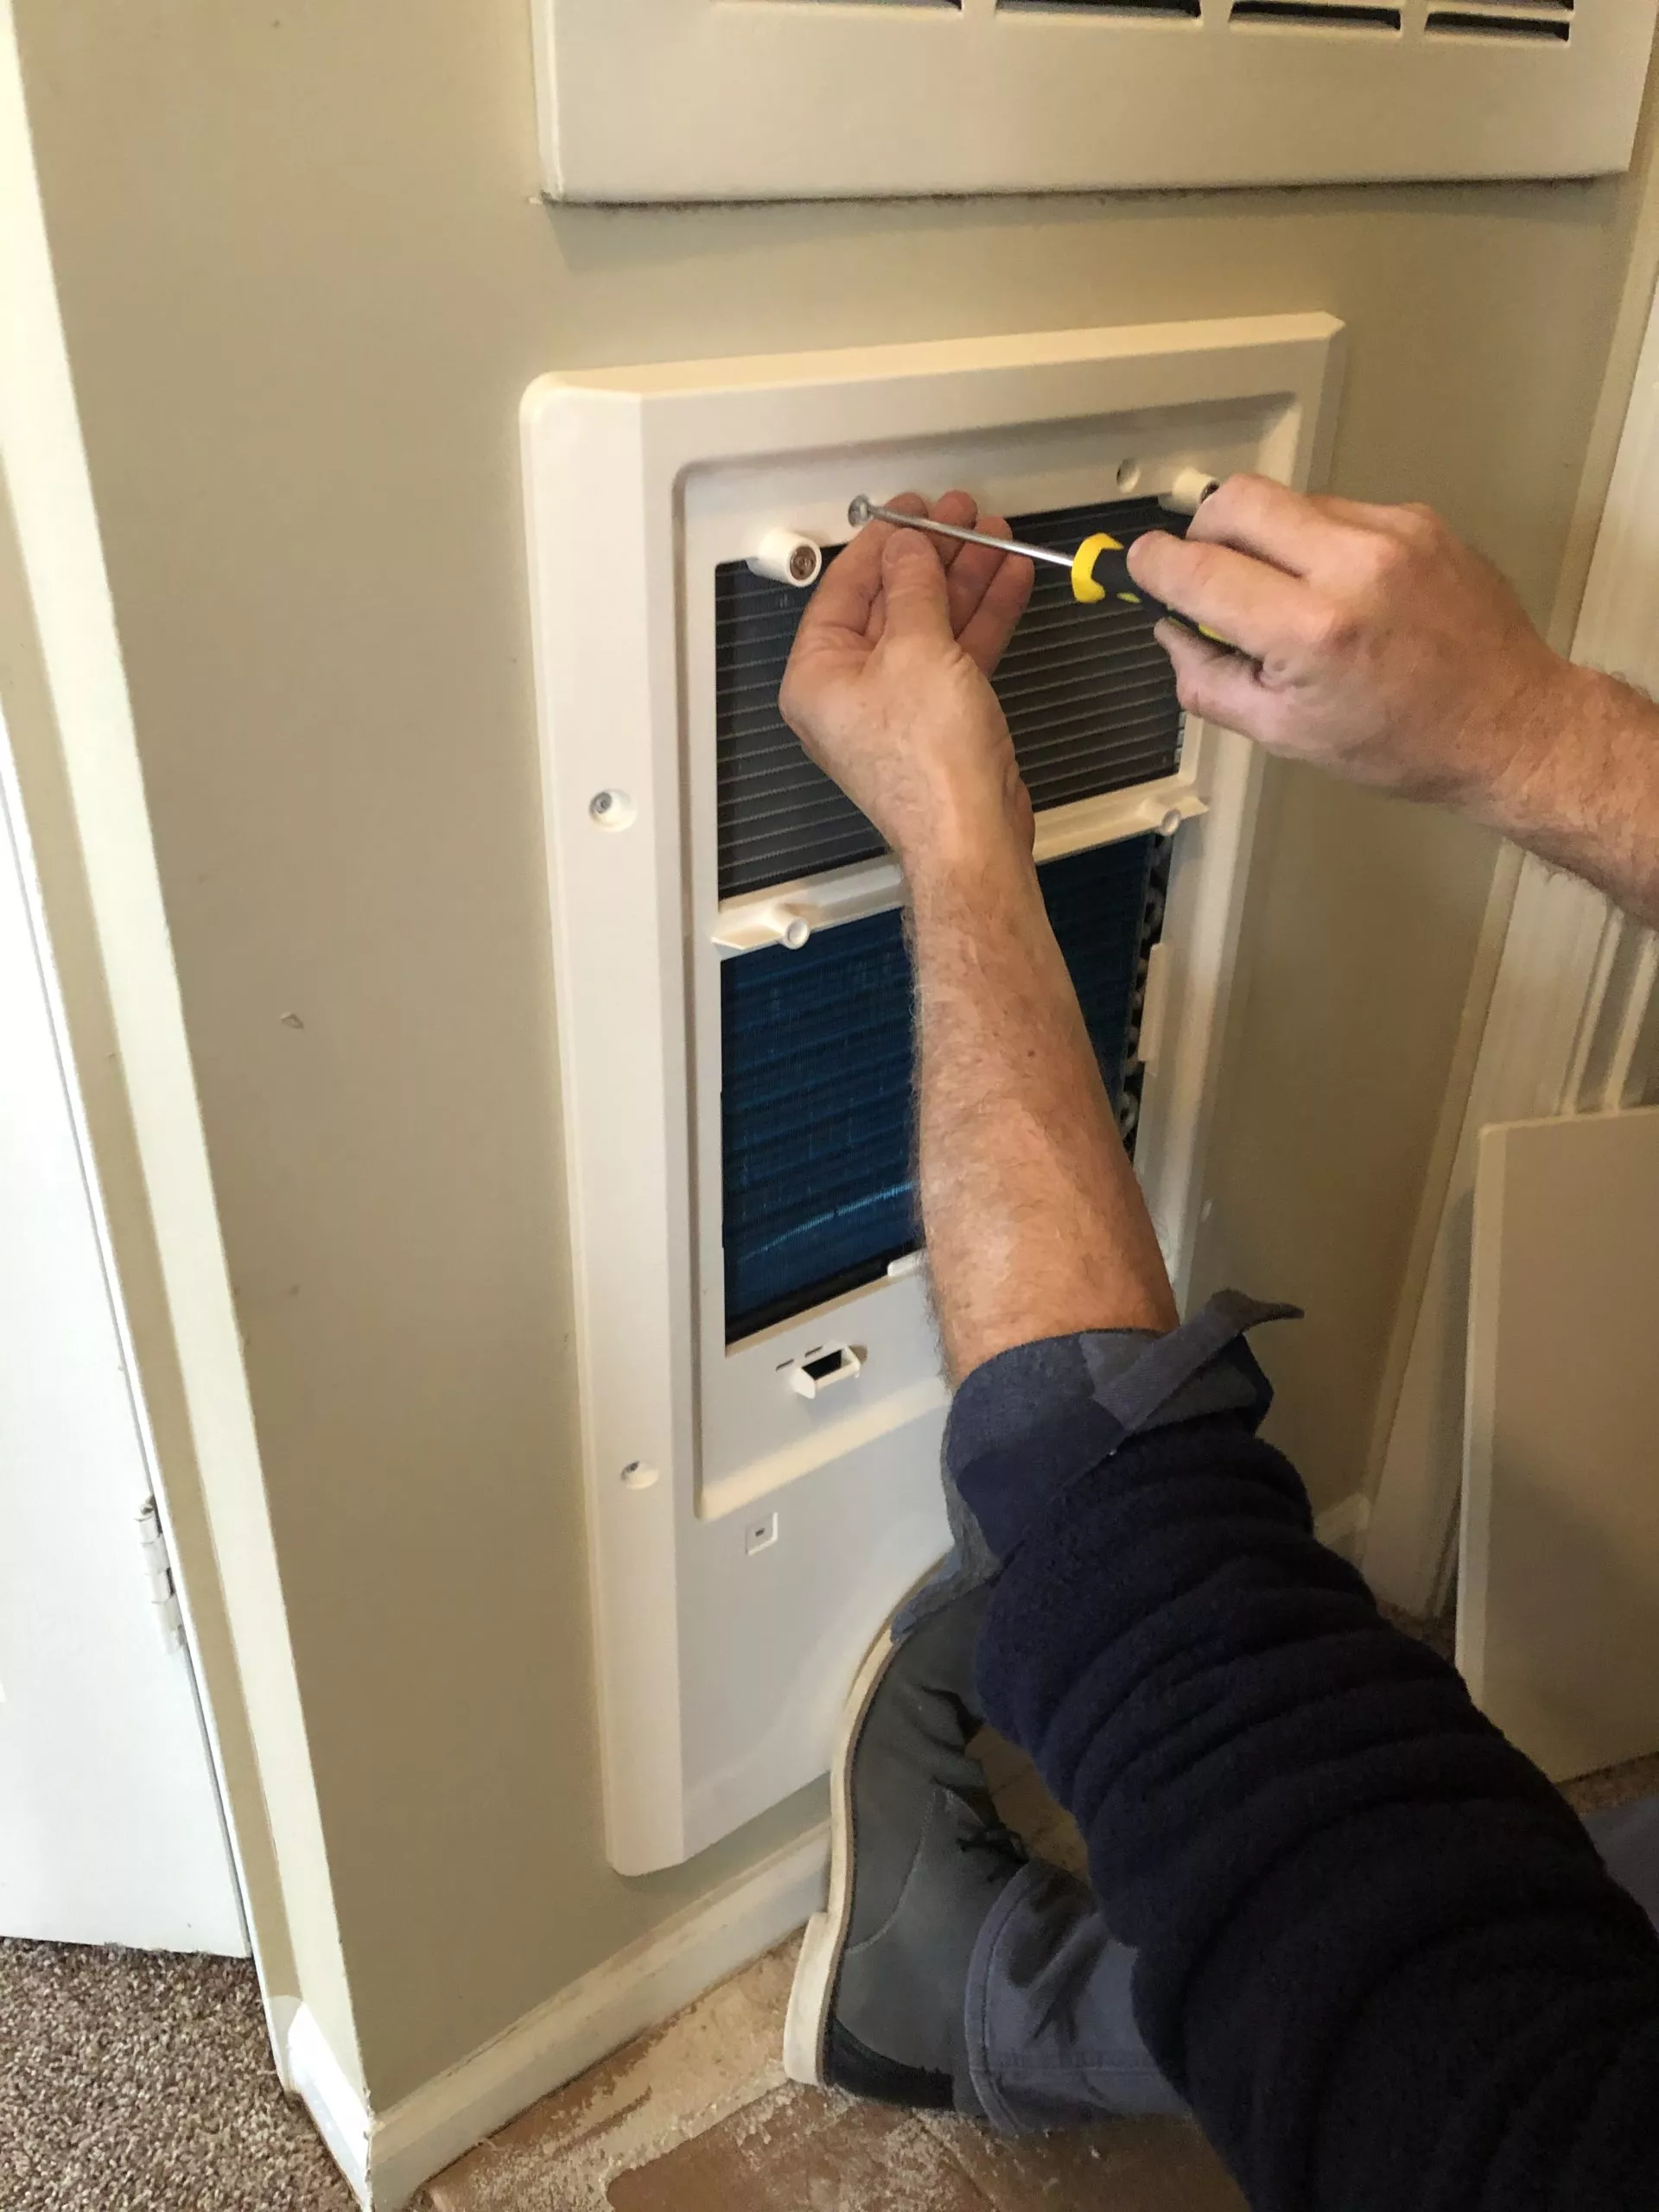
How to Install a Wall-Mounted Dehumidifier
A wall-mounted dehumidifier is one of the most effective solutions for managing excess moisture and maintaining balanced humidity levels throughout your home. These units are commonly integrated into a home's central climate control setup and are typically operated through a mounted control panel. A quality wall-mounted dehumidifier is essential for protecting your furniture, wooden structures, and personal belongings from damage caused by excessive dampness during humid seasons. Below you will find a straightforward guide on how to properly install a wall-mounted dehumidifier in your living space.
Tools and Materials You Will Need
- Wall-mounted dehumidifier unit along with its installation manual
- A dedicated electrical circuit and compatible circuit breaker
- Control panel and humidistat sensor
- Screws plus a screwdriver or power drill
- PVC drain line
- Copper water line
- In-line water filter
Choose the Right Location
Position your dehumidifier in a centrally located area of your home so it can effectively regulate moisture levels across the widest possible space. Pay close attention to the electrical requirements for the installation. If the existing wiring in the chosen location is insufficient, it may be necessary to bring in a licensed electrician to run a dedicated dehumidifier circuit with an appropriate breaker to power the unit safely.
Install the Control Panel
The control panel should be mounted in a separate central area of the home, away from heaters, air conditioning vents, windows, and exterior doors. Use the appropriate screws and a drill to fasten the panel securely to the wall. Next, mount the humidistat sensor on top of the control panel — this sensor enables communication between the control panel and the dehumidifier. Make sure the control panel is either battery-powered or properly wired into an electrical connection.
Mount the Unit and Connect the Lines
Secure the dehumidifier to the wall using the screws and hardware included with the system. Do not connect it to the power supply until all hoses and lines are properly attached. Start by fitting a PVC drain line to the base of the unit and routing it to an appropriate drainage point outside your home. Then connect the copper water line and attach it to a continuous water source. Lastly, install an in-line water filter within the unit to protect internal components from mineral buildup and sediment in the water supply.
Verify All Connections
Carefully inspect every connection point and confirm that the dehumidifier has been installed exactly as the manufacturer's instructions specify. Once you are confident there are no safety issues, power the unit on and follow the setup guide to program the sensor and configure the control panel to your desired humidity settings.
Looking for a reliable wall-mounted dehumidifier for your home?
Ebac AD850E Wall-Mounted DehumidifierUnderstanding Home Humidity and Dehumidifiers

If you live in a region with warm, humid summers or frequent rainfall, you are probably all too familiar with the feeling of sticky indoor air and condensation forming on windows. You may run your air conditioner more aggressively and keep windows sealed tight, but here is the surprising part — tightly sealed, energy-efficient homes can actually trap moisture inside and push indoor humidity to uncomfortable and even harmful levels.
Research shows that people tend to feel most comfortable when indoor relative humidity sits between 30% and 50%. However, in a poorly ventilated or heavily sealed home, indoor humidity can easily climb above 60% or even 70%, especially during warmer months. When the air holds that much moisture, it creates the perfect breeding ground for mold, mildew, dust mites, and bacterial growth.
Excess moisture in the air also causes central heating and cooling systems to work harder. The air feels warmer than it actually is, so you crank the thermostat down, driving up energy costs unnecessarily. This is where a dehumidifier comes into play — by actively pulling moisture from the air, it restores comfort and reduces strain on your HVAC system.
Problems Caused by Excess Moisture
Beyond general discomfort, high humidity introduces a range of issues throughout your home. Persistent dampness can lead to mold and mildew growth on walls, ceilings, and in hidden areas such as crawl spaces and behind drywall. This not only causes structural damage but can also trigger allergic reactions and respiratory problems.
Excess moisture encourages dust mites to thrive in bedding, upholstery, and carpeting — a significant concern for allergy sufferers. Wooden flooring, cabinetry, and trim can warp, swell, or develop unsightly stains. Paint may bubble and wallpaper can begin to peel away at the seams and edges.
Electronics and computer equipment can also be compromised by prolonged exposure to damp conditions. A whole-home or wall-mounted dehumidifier addresses these problems by maintaining consistent, healthy humidity levels around the clock.
Types of Dehumidifiers
When shopping for a dehumidifier, you will find several types available. Refrigerant (compressor) dehumidifiers are the most common. They draw moist air over cold coils, causing water vapor to condense and drip into a collection tank or drain line. These models work best in warm environments where humidity is consistently high.
Desiccant dehumidifiers use a moisture-absorbing material to pull water from the air. These tend to perform better in cooler temperatures where compressor models lose efficiency. They are generally quieter but consume more energy.
Wall-mounted dehumidifiers are ideal for permanent installation. They are connected directly to plumbing for continuous drainage and to your electrical system for uninterrupted operation. This eliminates the hassle of emptying water tanks or moving portable units from room to room, making them the most convenient choice for whole-home moisture management.
Choosing the Right Dehumidifier
Price is naturally a key factor. Portable dehumidifiers can range from as little as $30 for a compact single-room unit to over $300 for a high-capacity console model. Wall-mounted systems cost more upfront but deliver long-term savings through lower maintenance and energy efficiency. Consider whether you need to manage humidity in just one room — such as a basement or bathroom — or across an entire floor of your home.
Operating costs matter too. Think about energy consumption, water drainage method, and ongoing filter maintenance. Some dehumidifiers have washable, reusable filters while others require periodic replacement, adding to long-term costs.
Look for a built-in humidistat — a device similar to a thermostat but designed to measure moisture levels instead of temperature. When the humidity drops to your desired level, the humidistat automatically shuts the unit off. This prevents the air from becoming too dry and helps conserve energy. Maintaining balanced humidity is just as important as reducing it, so a humidistat is a feature well worth having.
Operating and Caring for Your Dehumidifier
Always follow the manufacturer's specific instructions for your model, but here are some general tips for keeping your dehumidifier in peak condition. Whenever possible, use demineralized or distilled water for any cleaning processes to prevent scale and mineral buildup on internal components.
Standing water can become a breeding ground for bacteria. If your unit has a collection tank, empty and clean it at least once a week during active use. When the unit will be idle for an extended period, empty any remaining water and give the tank a thorough cleaning before storage.
Filters should be cleaned or replaced on a regular schedule, since damp filter surfaces can harbor bacteria and reduce airflow efficiency. At the end of each humid season, give the entire unit a deep cleaning with a mild anti-bacterial solution so it is ready for the next cycle.
How to Prevent Corrosion in Your Dehumidifier

Routine cleaning and consistent maintenance are the best defenses against corrosion in any dehumidifier. Components such as the condensation coils, reservoir tank, drain valves, and fill valves should be inspected and replaced when worn to prevent corrosion from spreading to other parts of the unit. Here is a step-by-step approach to keeping your dehumidifier corrosion-free.
Disconnect and Detach the Device
Begin by unplugging the dehumidifier from the power supply and allowing it to cool down completely. If the unit is connected to a water supply line, disconnect it. Remove any wall-mounting hardware to free the unit for inspection and cleaning.
Drain All Remaining Water
Open the water reservoir and empty all water from the holding tank or condensation cylinder. Some units have a dedicated drain button, while others require manual draining. Follow the manufacturer's instructions to ensure every last bit of water is removed. Then detach the condensation cylinder or reservoir tank and disconnect any attached wires. Remove the drain screen and set it aside for cleaning.
Clean the Cylinder and Drain Screen
Use a commercial cleaner formulated for lime and hard water removal, or prepare a homemade mixture using vinegar and baking soda. Apply the solution generously to all interior and exterior surfaces of the cylinder as well as the drain screen. Use a soft-bristle brush or sponge to scrub away any lime or mineral deposits. Rinse everything thoroughly with clean water to ensure no residue remains.
Clean the Valves
Refer to your unit's service manual for the correct procedure to remove the fill valve and drain valve. Once detached, apply the cleaning solution to a sponge or cloth and wipe the valve surfaces clean — but take care not to get the solenoid wet. Use a damp cloth to wipe away any remaining residue, then dry with a clean cloth. Be careful not to poke or disturb the flow regulator during cleaning, as damaging it can shorten the lifespan of the device. Clean the drain valve in the same way. Make sure both valves are completely dry before reinstalling them. Restart the unit to confirm everything is working correctly.
Replace Worn-Out Cylinders and Valves
If cylinders or valves show signs of significant wear or corrosion, they should be replaced promptly to prevent the damage from spreading to other internal components. Remove the affected parts according to the service manual, source exact replacement parts from an authorized retailer or the manufacturer directly, and install them as directed. Test the device to confirm proper function. At the end of each dehumidifying season, drain all water from the cylinder, clean all valves, and store the components in a cool, dry location.
Ready to Control Your Home's Humidity?
Discover the Ebac AD850E — engineered for effortless wall-mounted moisture management.
Ebac AD850E Wall-Mounted Dehumidifier