


 Damage
  Loss
Loss  Theft
Theft 


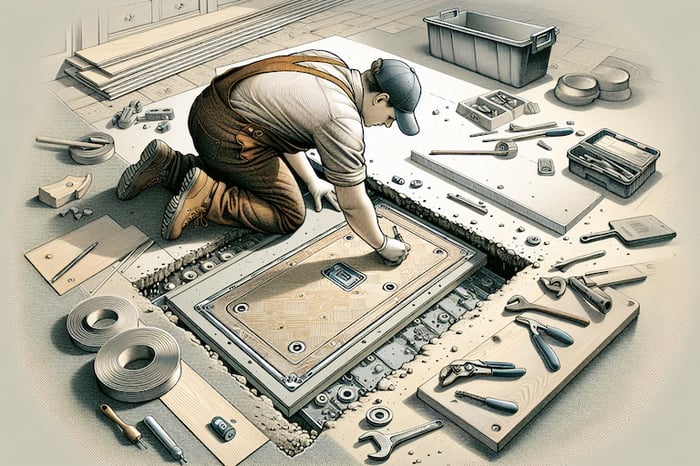
How to Install an In-Ground Floor Safe for Ultimate Security
A Complete Guide to Protecting Your Valuables
When it comes to safeguarding your most precious possessions, conventional security measures might fall short. An in-ground floor safe offers an unparalleled level of protection by concealing your valuables beneath the very foundation of your home. This comprehensive guide walks you through everything you need to know about selecting, installing, and maintaining a floor safe that provides discreet, reliable security.
Understanding In-Ground Floor Safes
An in-ground floor safe represents one of the most secure storage solutions available for homeowners. Unlike traditional wall-mounted or freestanding safes, these units are embedded directly into your concrete foundation, making them virtually impossible to detect or remove without specialized equipment and considerable effort.
These safes are engineered with reinforced steel construction and are designed to withstand both physical attacks and environmental challenges. The installation process involves creating a cavity in your concrete floor, positioning the safe, and seamlessly integrating it with your existing flooring material.
Why Choose a Floor Safe?
Floor safes provide exceptional security through obscurity. Because they're hidden beneath flooring and anchored in concrete, potential intruders would need to know the exact location and have significant time and tools to access them. This makes them ideal for storing jewelry, important documents, emergency cash, and other irreplaceable items.
Planning Your Floor Safe Installation
Proper planning is essential for a successful floor safe installation. Before you begin, you'll need to carefully consider the location, ensure you have the right tools and materials, and understand the full scope of the project. A well-planned installation will provide decades of reliable security.

Selecting the Perfect Location
The location you choose for your floor safe is critical to both its security and accessibility. Consider areas that offer privacy while remaining convenient for your regular use. Bedrooms, closets, and home offices are popular choices because they balance discretion with easy access.
- Choose a location with adequate concrete depth to accommodate your safe
- Ensure the area is free from plumbing lines, electrical conduits, and structural supports
- Select a spot where the flooring can be easily removed and restored
- Consider accessibility for regular use while maintaining security
- Verify that the location stays dry and isn't prone to moisture accumulation
What You'll Need Before Starting
Gathering all necessary materials and equipment before beginning your installation will ensure a smoother process. This project requires specialized tools and materials that you may need to rent or purchase.
- Your selected in-ground floor safe
- Concrete cutting saw or angle grinder with diamond blade
- Jackhammer or demolition hammer for concrete removal
- Quick-setting concrete mix for securing the safe
- Level to ensure proper safe positioning
- Safety equipment including goggles, gloves, and dust mask
- Measuring tools and marking materials
- Flooring materials matching your existing floor
Important Safety Notice
Working with concrete cutting equipment and heavy machinery requires proper safety precautions. Always wear appropriate protective gear and consider hiring professional contractors if you're not experienced with this type of work. Additionally, check local building codes and obtain necessary permits before beginning your installation.
Step-by-Step Installation Process
Mark and Measure Your Opening
Begin by carefully measuring your safe's external dimensions and adding an extra two inches on all sides for concrete placement. Use a chalk line or marker to outline the area on your floor where you'll be cutting. Double-check your measurements to ensure accuracy before proceeding with any cutting.
Remove Existing Flooring
Carefully remove the flooring material within your marked area. Whether you're working with tile, hardwood, or carpet, take care to preserve the edges for a clean restoration later. Save any removed materials that can be reused during the finishing process.
Cut Through the Concrete
Using your concrete saw, carefully cut along your marked lines to the required depth. This process will generate significant dust, so ensure proper ventilation and wear respiratory protection. Make multiple passes if necessary to achieve the proper depth, which should accommodate your safe plus several inches for the concrete base.
Excavate the Concrete Cavity
Use a jackhammer or demolition hammer to break up and remove the concrete within your cut lines. Work systematically to create a clean cavity, removing all debris as you go. The cavity should be deep enough for your safe to sit flush with or slightly below your floor level.
Prepare the Foundation Base
Create a level base at the bottom of your cavity using gravel or sand. This provides drainage and a stable foundation for your safe. Compact the base material thoroughly to prevent any settling after installation. This step is crucial for long-term stability.
Position and Level Your Safe
Carefully lower your safe into the prepared cavity. Use a quality level to ensure the safe sits perfectly horizontal in all directions. The lid should be flush with or just below your floor surface. Make any necessary adjustments using shims or additional base material before proceeding.
Secure with Concrete
Mix your quick-setting concrete according to manufacturer instructions and pour it around the safe, filling all gaps between the safe and the cavity walls. Work the concrete down with a rod or stick to eliminate air pockets. Ensure the concrete is level with your surrounding floor surface. Allow the concrete to cure completely according to the product specifications.
Restore Your Flooring
Once the concrete has fully cured, restore your flooring over the installation area. Take care to match the existing floor pattern and ensure the safe's door can open freely. Use appropriate adhesives and finishing materials to create a seamless appearance that conceals your safe's location.
Essential Installation Tips
Always verify that your concrete foundation is thick enough to accommodate your chosen safe before beginning any work. Most floor safes require a minimum concrete depth of 12 inches, though this varies by model. Additionally, consider installing your safe before any flooring renovations to simplify the process.
When working with concrete, remember that proper curing time is essential. Rushing this process can compromise the security and stability of your installation. Plan for at least 24-48 hours of curing time before attempting to use your safe or restore flooring over it.
Maintaining Your Floor Safe
Regular maintenance ensures your floor safe remains secure and functional for years to come. Periodically check the locking mechanism and lubricate moving parts according to manufacturer recommendations. Inspect the seal around the safe to ensure no moisture is penetrating the cavity, as this could lead to rust or deterioration.
- Test the locking mechanism monthly to ensure smooth operation
- Keep the safe interior dry with silica gel packets or dehumidifiers
- Inspect seals and gaskets annually for wear or damage
- Clean the safe lid and surrounding floor area regularly
- Update your access codes or keys periodically for enhanced security
Maximizing Your Safe's Security
Beyond proper installation, several strategies can enhance your floor safe's security. Avoid discussing your safe's location with anyone outside your immediate household. Consider installing motion sensors or surveillance cameras in the room housing your safe. Document the contents of your safe with photographs and maintain this inventory in a separate secure location.
Insurance Considerations
Notify your homeowner's insurance provider about your floor safe installation. Many insurance companies offer reduced premiums for homes with certified safes, and proper documentation ensures your valuables are adequately covered in case of loss. Keep receipts and certification documents in a separate secure location.
Professional Installation vs. DIY
While experienced DIY enthusiasts can successfully install a floor safe, this project demands significant skill with concrete work and heavy equipment. Professional installation ensures proper depth, levelness, and integration with your existing structure. If you're uncertain about any aspect of the installation, consulting with or hiring professionals is a worthwhile investment in your home's security.
Professional installers bring expertise in avoiding common pitfalls such as damaging utility lines, creating structural weaknesses, or improper safe positioning. They also carry insurance that protects you from liability should any problems arise during installation.
Secure Your Valuables Today
The Hollon Safe In-Ground Floor Safe offers premium protection with heavy-duty construction, reliable locking mechanisms, and weather-resistant design. Engineered for permanent installation, this safe provides the ultimate security solution for your most valuable possessions.
Hollon Floor Safe B1500Final Thoughts
Installing an in-ground floor safe represents a significant investment in your home security. The combination of concealment, physical protection, and permanent installation creates an exceptionally secure storage solution. By following proper installation procedures and maintaining your safe correctly, you'll enjoy decades of reliable protection for your most precious belongings.
Remember that the key to effective safe security lies not just in the quality of the safe itself, but in the thoughtfulness of its installation and the discretion with which you use it. Take your time with each step of the process, prioritize quality over speed, and you'll create a security feature that serves your family for generations to come.