


 Damage
  Loss
Loss  Theft
Theft 


Where to Place a Mini Split— And Where Not To

Why Placement Matters
Industry experts agree that correct installation — particularly where you position the unit — plays a huge role in how well your air conditioner performs over the long haul. A strategically placed mini split optimizes airflow and lowers your energy costs, whereas a poorly chosen location can drive up monthly bills and shorten the system's life.
In the sections below, we'll cover the critical factors behind mini split placement so you can confidently tell a good location from a bad one.
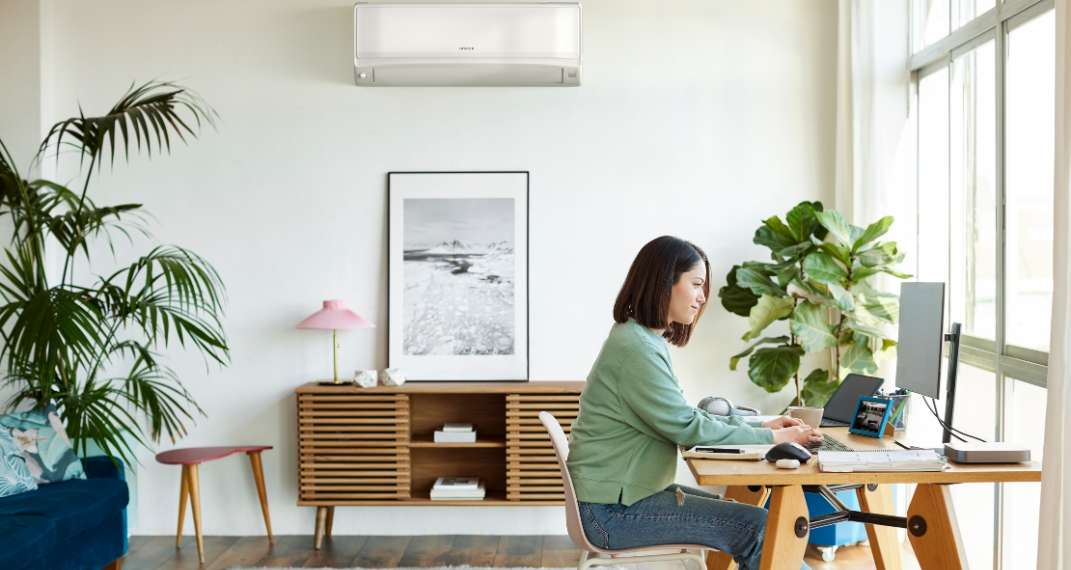
Indoor Units
The indoor air handler is what removes excess heat from your living space and circulates conditioned air throughout the room. Because they connect through slim tubing and compact cable runs, mini split indoor units offer remarkable flexibility in where they can be mounted — far more than traditional ducted systems.
Best Indoor Locations for Mini Split Units
Wall Mounting & Proper Height
How high should your indoor unit be? Aim to install it on a central wall, roughly 6 to 8 feet (180–240 cm) above the floor, with adequate clearance around the unit. This height allows conditioned air to distribute evenly across the room. Proper wall positioning also keeps the airstream from blowing directly on people — occasional breezes are fine, but a constant draft is not comfortable.
Air Distribution & Coverage
For the best results, mount the unit where air can circulate freely without anything blocking its path. Keep it away from the ceiling line, since tight gaps above the unit can choke airflow and hurt efficiency. In larger rooms, centering the unit along the longest wall helps minimize hot and cold spots.
Steering Clear of Furniture & Appliances
Make sure the space surrounding the indoor unit stays open and unblocked. Obstructions force the system to work overtime, create uneven temperatures, and consume more energy. Leave at least a few feet of clearance on all sides, and never tuck the unit into a corner or behind bulky furniture.
Easy Access for Maintenance
Filters should be cleaned or swapped every month or two, so choose a location that's easy to reach. A conveniently placed unit makes routine upkeep simpler for you and for any HVAC technician you call. Consistent filter maintenance prevents common AC problems and keeps your indoor air fresh and healthy.
Ideal Room Choices
Not every room benefits equally from a mini split. The best candidates include:
✓ Bedrooms — Whisper-quiet operation and precise temperature control make mini splits perfect for uninterrupted sleep.
✓ Living Rooms — As the main gathering hub, living areas benefit enormously from consistent, comfortable climate control.
✓ Home Offices — Maintaining a comfortable workspace boosts focus and productivity throughout the day.
Indoor Areas to Avoid for Mini Split Installation
✗ Near Heat Sources
Placing your AC unit beside ovens, radiators, or sun-drenched windows can trick the thermostat and throw off temperature regulation. Excess heat forces the system to overwork, which spikes your energy bills. This is one of the most frequent mistakes homeowners make.
✗ Above Doors & High-Traffic Zones
Mounting the unit over a doorway or in a busy hallway might seem space-efficient, but the continuous airflow disruptions from people moving through can hamper the unit's performance. Doors opening and closing repeatedly also create unwanted temperature swings.
✗ Close to Electronics or Sensitive Gear
Be cautious about positioning the unit near TVs, computers, or other heat-sensitive equipment. Mini splits generate airflow and minor temperature shifts that can affect the performance of nearby electronics.
✗ Rooms with Poor Insulation
Insulation quality is a key factor in choosing the right room. When a room is poorly insulated, the system has to push harder to hold the desired temperature, wasting energy and increasing wear. Good insulation also keeps outdoor pollutants at bay. Before installing, inspect doors and windows for air leaks.
Rooms You Should Think Twice About
Although mini splits are adaptable, certain rooms are simply not ideal due to fluctuating conditions or inefficiency concerns:
Kitchens — Cooking heat interferes with the system's efficiency and wastes energy.
Corridors — Passageways don't need dedicated climate control, and foot traffic creates constant airflow disruptions.
Basements — High humidity and limited ventilation can reduce the unit's effectiveness and shorten its lifespan.
Outdoor Units
Where you place the outdoor condenser matters just as much as the indoor air handler. In this section, we'll look at the smartest locations for your outdoor unit and the environmental factors to keep in mind.
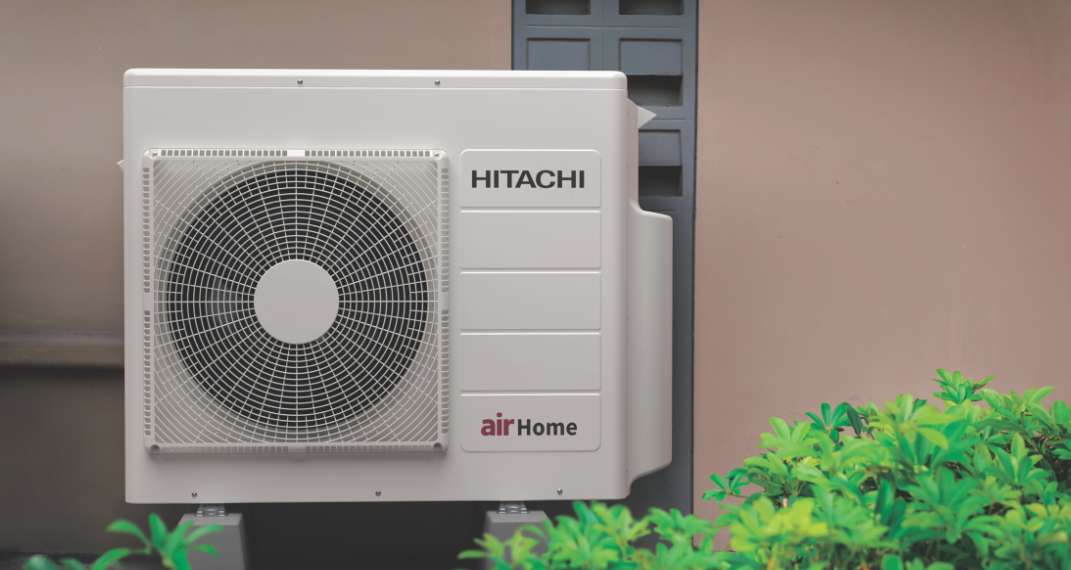
Best Outdoor Locations for Mini Split Units
Stable, Level Ground Support
An uneven surface can cause vibrations that damage internal components over time. Make sure your condenser sits on a stable, flat surface to ensure reliable operation and avoid long-term structural issues.
Wall-Mounted on Exterior Walls
If yard space is limited, mounting the condenser on an exterior wall is a solid option. Just verify that the mounting position doesn't block air intake and avoids excessive sun exposure throughout the day.
Sufficient Airflow & Clearance
Outdoor units need plenty of breathing room to prevent the compressor from overheating. Allow at least 1 to 3 feet of clearance on every side for unrestricted intake and exhaust. Never position the condenser flush against walls, fences, or other obstacles.
Weather Protection
Mini split condensers are engineered for outdoor conditions, but they still need shielding from harsh winds, heavy snowfall, or torrential rain. Placing the unit under an eave or in a sheltered alcove adds an extra layer of protection.
Keeping the Area Clear of Debris
To prevent filter clogs and system strain, keep the surrounding space free of leaves, dirt, twigs, and other debris. Overhanging tree branches and dense vegetation can also restrict airflow and cause blockages.
Outdoor Areas to Avoid for Mini Split Installation
✗ Direct Sunlight Exposure
Constant sunlight drives up the condenser's temperature and forces it to work harder to cool your home. Choose a shaded area or install a sun shade to protect the unit from prolonged UV exposure.
✗ Areas with Dust, Dirt, or Pollutants
If the condenser is placed in a spot prone to airborne dust, construction debris, or heavy pollen, its filters and components will clog much faster. Stay away from zones with excessive foliage, active construction, or other sources of particulate buildup.
✗ Close to Walls or Fences
Cramming the outdoor unit against boundary walls or fencing restricts vital airflow. As emphasized throughout this guide, adequate space around the condenser is essential for proper ventilation and cooling performance.
✗ Flood-Prone or Low-Lying Spots
Never install the condenser in an area that collects water or is prone to flooding. Water damage can devastate the system's internals. Opt for elevated positions or spots with reliable drainage so water doesn't pool around the base.

FAQ
What's the best place to install a mini split?
The ideal location is typically a central gathering area like the living room or lounge. These rooms tend to be more spacious and less cluttered by furniture, allowing the system to spread conditioned air evenly across the space.
Where should you not install a mini split?
Steer clear of rooms with poor insulation, excessive sunlight, or restricted airflow caused by furniture or walls. Indoor units should avoid corners and high-traffic zones, and skip rooms like kitchens or areas with heat-producing appliances.
Where should you install a mini split outdoor unit?
The best outdoor placement is on a firm, level surface with ample clearance on all sides. A shaded or sheltered location is ideal — away from fences, walls, and areas that flood or collect debris.
How much clearance does a mini split need?
Indoor units should be mounted 6 to 8 feet above the floor with several inches of clearance above and around them. Outdoor condensers need at least 1 to 3 feet of open space on every side for proper air circulation.
The Value of a Professional Assessment
Who should install your mini split? While it can seem straightforward, the process goes well beyond simply hanging a unit on the wall. A proper DIY installation demands electrical know-how, precise mounting, and a solid understanding of what's behind your walls before you drill.
If you're still uncertain about the best spot for your unit, consider discussing these key questions with a qualified installer:
• Where is the optimal spot for airflow in this specific room?
• How will the unit's position impact future maintenance?
• Are there any structural issues to account for?
• What size mini split do I actually need?
• What can I do to keep the system running efficiently after installation?
Asking the right questions upfront will help you make a well-informed decision and ensure your unit delivers peak efficiency, comfort, and durability for years to come. Start planning with a trusted professional today!
The Importance of Getting Your Mini Split Placement Right
Smart mini split placement keeps your system running at its best. A well-positioned unit ensures balanced airflow, reduces strain on components, and delivers consistent temperatures throughout your home. On the flip side, poor placement leads to uneven cooling, inflated energy bills, and more frequent maintenance calls.
Investing time in planning your installation now can save you from headaches down the road. Whether you're setting up a brand-new unit or rethinking the position of an existing one, working with a professional ensures you cover all the bases — from insulation quality and airflow dynamics to accessibility and clearance.