


 Damage
  Loss
Loss  Theft
Theft 


Mini-Split Installation: How to Install a Mini Split in 4 Steps
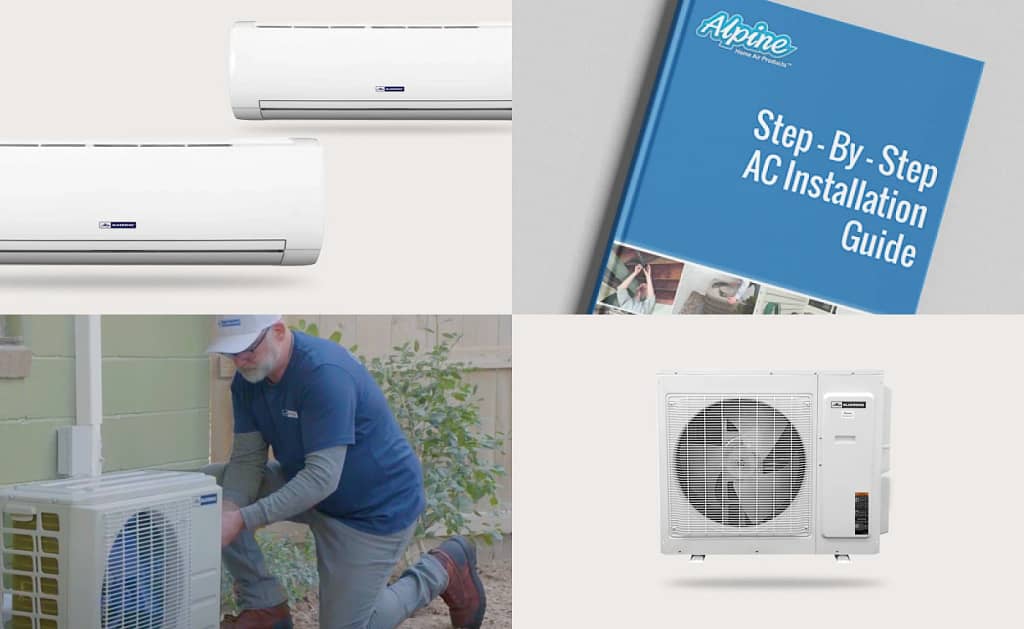
Thinking about installing a ductless mini-split on your own? You are far from alone. A huge number of homeowners handle the bulk of the installation themselves, only bringing in a technician for the final start-up. With the right DIY-friendly mini-split, you can even manage the entire process from beginning to end without professional help.
In this guide, we break down four straightforward steps for installing a single-zone mini-split system with a wall-mounted indoor air handler. Whether you are a seasoned do-it-yourselfer or picking up tools for the first time, this article has you covered.
Preparing for Mini-Split Installation
Before you begin a ductless mini-split installation, a handful of important considerations will help ensure peak performance and lasting comfort. Think through each of these factors no matter how or where you plan to use the system.
Sizing Your Mini Split
Getting the right capacity for your mini-split is essential. A unit that is too large will short-cycle, waste energy, and leave humidity problems. A unit that is too small simply will not keep the space comfortable.
The most reliable way to find the perfect size is to perform a load calculation—either with the help of a professional or by using an online BTU calculator. An accurate load calculation ensures you choose a system that matches the demands of your room.
Location and Placement
Where you position the indoor and outdoor units has a major impact on efficiency. Mount each indoor unit in a spot with unobstructed airflow so conditioned air can circulate freely throughout the room or zone.
When using wall-mounted air handlers, consider the mounting height—roughly seven feet above the floor is generally ideal for airflow.
For the outdoor condenser, choose a stable, level surface with plenty of clearance for ventilation. Keep it shielded from intense direct sunlight and clear of leaves, dirt, or other debris that could restrict air movement.
Electrical Requirements
Mini-splits need their own dedicated electrical circuit with the correct voltage and amperage. Most models operate on 220 V wiring, the same type used by large household appliances. Smaller single-zone units (12,000 BTU or below) may run on a standard 110–120 V circuit instead. Always confirm your unit's electrical specs before you begin.
Even if you plan to do everything else yourself, consulting a licensed electrician for the wiring portion is a smart move. A qualified electrician will make sure your panel and wiring meet code and operate safely.
Taking care of these preparation steps upfront sets the stage for years of reliable heating and cooling in your home or office.
How to Install a Mini-Split in 4 Steps
Follow each step carefully and you will have your ductless system mounted, connected, wired, and running in no time.

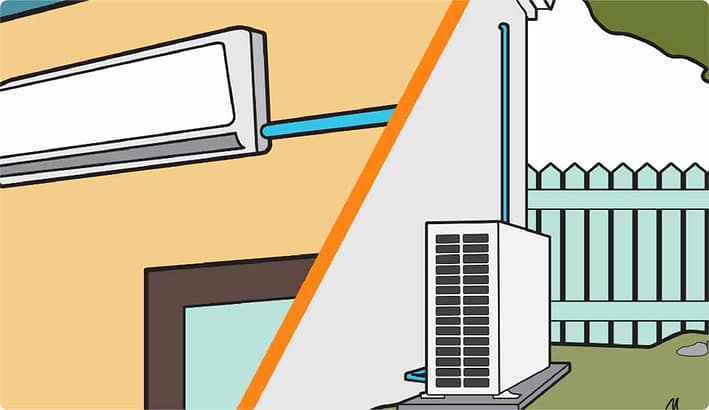
Mount
Outside: Set the condenser on a concrete pad or a wall-mounting bracket in a convenient, level location.
Inside: Secure the included mounting plate to the wall exactly where you want the air handler to hang.
With a hole saw, drill through the wall at a slight downward angle near the lower right corner of the mounting plate. Optionally insert a wall sleeve for a cleaner finish.
Hang the indoor unit on the mounting plate, feeding the refrigerant lines, wiring, and drain tubing through the hole to the outside.
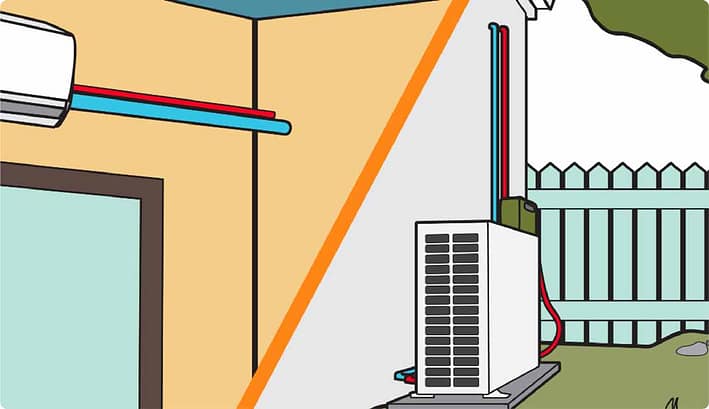
Connect
Use a torque wrench to fasten the refrigerant lines to the connectors on the indoor unit first, then repeat on the outdoor unit.
Wire the indoor and outdoor units together, matching each wire color to its corresponding terminal.
Route the condensate drain line away from the wall so water flows freely to the outside.
Electrical
If you are not experienced with high-voltage electrical work, we strongly recommend hiring a licensed electrician for this step.
Switch off the power at your main breaker box.
Run a dedicated 220 V or 110 V circuit (depending on your model) from the breaker panel to a disconnect box installed near the outdoor unit.
Install a weatherproof electrical whip to link the disconnect box to the condenser.
Once all connections are secure, turn the breaker back on.
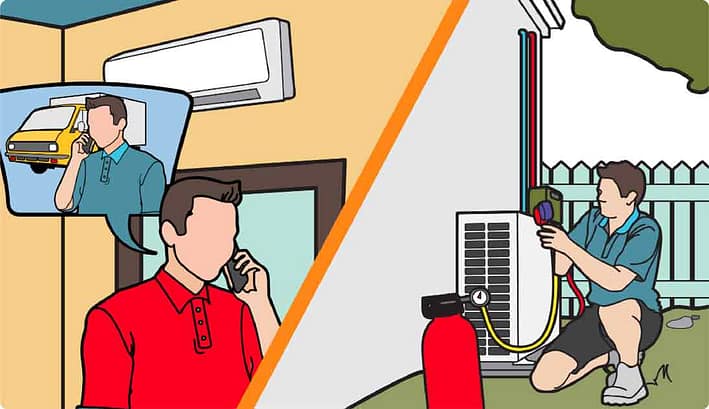
Start-Up
A. Conventional Mini-Split — Hire a Pro
Your HVAC contractor will handle the following:
• Pressure-test the lines for leaks
• Vacuum the refrigerant lines
• Release the factory-charged refrigerant from the condenser into the system
• Top off refrigerant if the line set exceeds the factory precharge length
• Power up and test the entire system
B. DIY Mini-Split — Self Start-Up
• Open the service valves on the outdoor unit with an Allen wrench to release the refrigerant into the lines.
• Spray soapy water on every connection point and watch for bubbles. If you spot a leak, re-tighten the fitting to the correct torque spec.
• Switch on the system and confirm it is heating or cooling as expected.
After the Mini-Split Installation
Congratulations—your ductless mini-split is up and running! But the work does not end at installation. Like any home comfort system, a mini-split needs regular attention to keep performing at its best.
Once the install is complete, keep the following maintenance tasks on your radar:
Maintaining Your System
Clean or swap out the air filters on the schedule recommended by the manufacturer. Clogged filters choke airflow, hurt efficiency, and degrade indoor air quality.
Periodically wash down the indoor and outdoor coils to remove dust and debris that block heat transfer. Handle the delicate coil fins with care.
Inspect refrigerant lines and fittings regularly. If you notice signs of a refrigerant leak, contact a licensed HVAC technician promptly for repairs.
Make sure the drain line stays clear and free of blockages. A clogged condensate line can lead to water damage inside your walls or ceilings.
If your unit has accessible moving components such as fan motors, lubricate them on the schedule recommended by the manufacturer.
Although many of these tasks are straightforward enough to handle on your own, scheduling an annual professional tune-up is always a smart idea. A trained technician can catch hidden problems before they become expensive repairs.
Installation Troubleshooting and FAQs
No matter whether you go the DIY route or hire a professional, bumps along the way are normal. Below you will find the most common challenges and the questions we hear most often.
Common Installation Challenges
Refrigerant management is one of the trickiest parts of the job. The most frequent issue is a leak at the line set connections, which can sap efficiency or cause the system to malfunction. Always double-check every fitting and test with soapy water.
Correct wiring is vital for safe, reliable operation. Common pitfalls include mismatched wire colors, insufficient voltage, and accidental shorts. Stick to the manufacturer's wiring diagram at all times.
Mini-splits produce condensate that must drain properly. A kinked or clogged drain line leads to water damage. Regularly inspect and flush the line to prevent buildup.
Poor positioning of either unit can hurt airflow and efficiency. Mount the indoor unit at the recommended height and give the outdoor condenser plenty of breathing room on a solid surface.
The indoor and outdoor units must communicate for accurate temperature regulation. If you see error codes, check the control wiring, verify settings, and confirm the remote control is pairing correctly.
Common Questions About Mini-Split Installation
Q: Do I need to hire a professional for installation?
Professional installation is recommended for safety and warranty purposes. That said, experienced DIYers can often handle it themselves depending on the brand and model. Many manufacturers now offer DIY-friendly systems specifically designed for self-installation.
Q: How long does the installation process take?
It depends on the complexity of the setup. A straightforward single-zone installation typically takes several hours. More involved multi-zone projects can stretch to a full day.
Q: Can I install multiple indoor units with one outdoor unit?
Absolutely. Multi-zone mini-split systems let you connect several indoor air handlers to a single outdoor condenser, which cuts down on both installation effort and overall cost.
Q: What maintenance is required after installation?
Regular upkeep includes cleaning or replacing air filters, washing condenser coils, clearing the drain line, and booking an annual professional service visit.
Q: Is a permit required for installation?
Permit requirements vary by jurisdiction. Many local building codes require a permit for HVAC work. Always check with your municipality before starting the installation.
Addressing these challenges and questions ahead of time paves the way for a smooth installation and years of efficient, comfortable heating and cooling.
Need More Help? Backyard Provider Has You Covered
Still have questions about installing a ductless mini-split? Reach out to us at Backyard Provider. Our team is ready to help you find the ideal mini-split system for your space, your budget, and your comfort goals.
When you purchase a mini-split through Backyard Provider, you get competitive pricing, fast shipping, and dedicated support from a team that knows HVAC inside and out.