


 Damage
  Loss
Loss  Theft
Theft 


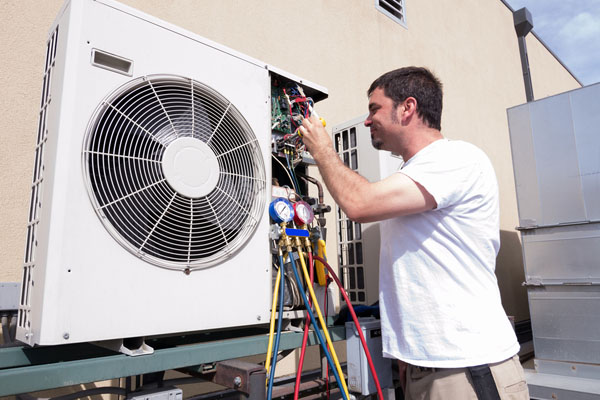
8 Steps to Install a Ductless Mini Split Air Conditioner
ini split air conditioners offer one of the most versatile and energy-efficient ways to heat and cool individual rooms. Unlike traditional window units or central systems, a ductless mini split delivers quiet, precise climate control — and with the right tools and preparation, installation is absolutely achievable for a capable DIYer.
Gather these tools before you begin. Having everything ready ahead of time prevents mid-installation delays and ensures a clean, professional result.
Tape Measure
Needed to confirm wall thickness, measure the refrigerant line run, and space mounting brackets correctly.
Torque Wrench
Ensures refrigerant line flare connections are tightened to spec — critical to prevent refrigerant leaks.
Vacuum Pump
Used to purge air and moisture from the refrigerant lines before charging the system.
Hole Saw
Cuts the wall penetration needed for the refrigerant lines, electrical wiring, and condensate drain.
Manifold Gauge Set
Monitors system pressure during and after evacuation to ensure proper refrigerant levels.
Flaring Tool
Creates precise bell-mouth flares on copper refrigerant tubing for leak-free connections.

Follow these steps in order. Skipping ahead or reversing sequence is one of the most common causes of installation errors.
Choose the Right Location for the Indoor Unit
Select a wall that is free of obstructions, away from direct sunlight, and close enough to the outdoor unit to keep the refrigerant line run short. The indoor head should be mounted high on the wall — typically 7 to 8 feet from the floor — to allow efficient air circulation throughout the room. Avoid placing it directly above electronics, furniture, or beds. Make sure the chosen wall can support the bracket weight and provides a clear path for the line set to exit to the outside.
Mount the Indoor Unit Bracket
Use a level and stud finder to locate solid anchor points. Secure the mounting plate firmly to the wall with the provided hardware, ensuring it is perfectly level — even a slight tilt can cause condensate drainage issues over time. Mark the hole position for the wall penetration before drilling, typically a 3-inch core hole angled slightly downward toward the exterior to help water drain away from the unit

Drill the Wall Penetration Hole
Using a hole saw at the marked position, drill through the wall at a slight downward angle toward the exterior. This ensures any moisture that enters the sleeve drains outward rather than into your wall cavity. After drilling, insert the included wall sleeve or conduit to protect the line set and wiring from the rough edge of the opening. Seal any gaps around the sleeve on both the interior and exterior with weatherproof foam or caulk once the lines are routed.
Connect the Refrigerant Lines
Carefully uncoil the copper line set and route it through the wall sleeve. Use a flaring tool to create clean, even flares on each copper tube end. Thread the flare nuts by hand first, then use a torque wrench to tighten them to the manufacturer's specified torque — overtightening or undertightening are equally problematic. Wrap the completed line set, electrical wiring, and condensate drain together in the provided foam insulation and line set cover before securing with cable ties at regular intervals.
- Always use a proper flaring tool — hand-cut flares leak
- Insulate the copper lines to prevent condensation and energy loss
- Leave a small service loop near both units for future maintenance access
Install the Outdoor Unit
Place the outdoor condenser on a solid, level pad — either a poured concrete base, prefabricated mini split pad, or heavy-duty wall bracket designed for the unit's weight. The pad should raise the unit above potential flood level and keep it clear of heavy snow or vegetation. Ensure at least 12 inches of clearance on all sides for adequate airflow. Secure the unit to the pad with the provided vibration-dampening feet and anchor bolts. Connect the refrigerant line set and electrical wiring to the outdoor unit terminals according to the wiring diagram in the installation manual.
Install the Electrical Disconnect Box
A dedicated electrical disconnect box must be mounted within sight of the outdoor unit, typically within 3 to 6 feet, as required by most local electrical codes. This allows service technicians to safely de-energize the system during maintenance. Run the correct gauge wiring from your electrical panel through conduit to the disconnect, then continue to the outdoor unit's terminal block. This work should be done by a licensed electrician unless you are fully qualified — improper wiring is both a code violation and a serious safety hazard.
Evacuate the Refrigerant Lines
Before opening the system's refrigerant valves, connect a vacuum pump and manifold gauge set to the service port on the outdoor unit. Run the vacuum pump until the system reaches 500 microns or below, then hold vacuum for a minimum of 30 minutes. A sustained, stable vacuum confirms the system is leak-free and dry. If the vacuum rises, you have a leak that must be found and corrected before proceeding. Never skip this step — residual moisture in the system will crystallize under pressure and destroy the compressor.
Open Refrigerant Valves and Power Up
Once a successful vacuum hold is confirmed, use a hex key to slowly open the liquid and suction service valves on the outdoor unit to release the factory-charged refrigerant into the line set. Replace the valve caps and torque them finger-tight. Restore power to the system at the breaker and disconnect, then power on the indoor unit using the remote control. Set it to cooling mode and allow the system to run for 10 to 15 minutes, checking supply and return air temperatures to confirm the unit is operating within normal range.
5 Safety Tips Before You Begin
- Always shut off the circuit breaker before making any electrical connections — verify with a non-contact voltage tester
- Never attempt to add or recover refrigerant yourself; this requires EPA Section 608 certification in the United States
- Use the correct wire gauge for your unit's amperage draw — undersized wiring is a fire risk
- Wear safety glasses and gloves when drilling and cutting; copper burrs and insulation fibers are sharp
- Pull all required permits — unpermitted HVAC work can create problems when selling your home or making insurance claims
Installation costs vary depending on your location, unit size, and whether you hire a professional or do the work yourself. Here's a general breakdown:
| Installation Type | Typical Cost Range | Notes |
|---|---|---|
| DIY Installation | $150 – $400 | Tools, line set covers, vacuum pump rental |
| Basic Professional Install | $300 – $700 | Single zone, simple wall penetration |
| Complex Professional Install | $700 – $2,000+ | Multi-zone, long line runs, permit fees |
| Electrical Panel Upgrade | $500 – $2,000 | Only required if panel capacity is insufficient |
Note: These figures are general estimates. Always obtain at least two quotes from licensed HVAC contractors in your area before committing.
Both approaches are valid depending on your comfort level, local code requirements, and the complexity of the installation.
✦ DIY Installation
- Saves $300–$1,000+ in labor costs
- Gives you full control over scheduling
- Best for single-zone, straightforward wall installs
- Requires comfort with electrical work and hand tools
- Must still use licensed electrician for panel wiring in many states
⊕ Hire a Professional
- Handles permits and code compliance automatically
- Warranty protection is often tied to certified installation
- Ideal for multi-zone systems or complex line runs
- Faster completion with proper equipment
- Required in some municipalities for refrigerant work
Not every mini split suits every application. Here are the most important factors to match the unit to your specific space:
Ready to Upgrade Your Home Comfort?
The Senville AURA 24,000 BTU concealed duct system delivers whisper-quiet performance with a sleek, hidden installation — no bulky wall heads, no compromised aesthetics.
Senville AURA 24K BTU Concealed DuctIn Conclusion
Installing a ductless mini split is one of the most rewarding home improvement projects you can tackle. Done correctly, it delivers years of energy-efficient, whisper-quiet climate control with no ductwork required. Take your time on the refrigerant line connections and the vacuum evacuation step — these two stages determine the long-term reliability of the system more than any other part of the process. When in doubt on the electrical side, bring in a licensed professional. The investment in a quality unit and a quality installation pays dividends every month on your utility bill.
Is It Necessary to Drill Holes in the Wall to Install a Mini Split Heat Pump?
Yes, in almost all cases. You need at least one wall penetration to route the refrigerant line set, communication wiring, and condensate drain from the indoor unit to the outdoor condenser. The hole is typically 2.5 to 3.5 inches in diameter and is sealed with foam and a decorative sleeve plate once the lines are routed.
What Are the Advantages of a Mini Split Air Conditioner?
Mini splits offer zone-by-zone climate control, eliminating the energy waste of conditioning unoccupied rooms. They operate at much lower noise levels than window units, require no ductwork, and modern inverter-driven compressors are significantly more efficient than conventional systems. Many models also provide heating, making them true year-round HVAC solutions.
What Is the Best Temperature Setting for a Mini Split Air Conditioner?
For cooling comfort, most users find 74°F to 78°F (23°C to 25°C) optimal. For maximum energy efficiency, setting the temperature no lower than 72°F (22°C) and using the unit's sleep or economy modes during overnight hours can meaningfully reduce operating costs without sacrificing comfort.