


 Damage
  Loss
Loss  Theft
Theft 


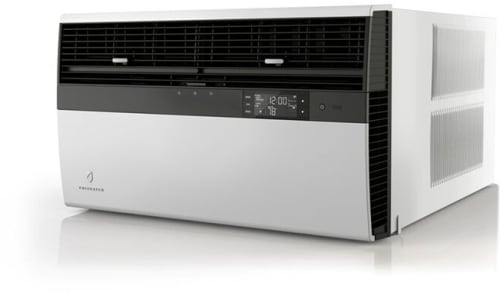
How to Install a Window Air Conditioner
Few things beat the relief of cool air flowing through a warm room on a sweltering summer day. A window air conditioner remains one of the most practical and cost-effective ways to control indoor temperatures without the expense of a full central HVAC system. These self-contained units fit snugly inside a standard window opening, draw only modest amounts of electricity, and can cool a single room or even a small apartment in minutes.
With the right model and a careful installation, you can enjoy comfortable temperatures all season long. This guide will walk you through every step — from picking the correct capacity to securing the unit safely in your window frame.

In This Article
- ▸ What to Think About Before You Install
- ▸ Choosing the Right Size & BTU Rating
- ▸ Energy Efficiency Tips
- ▸ Step-by-Step Installation Walkthrough
- ▸ What to Know Before Uninstalling
What to Think About Before You Install
Room Size & Window Type
Start by selecting a window with enough structural strength to support the unit's weight. Double-hung windows are the most common and the easiest to work with — simply raise the lower sash, position the air conditioner on the sill, and close the sash down onto the unit's top flange. Casement or sliding windows require specialized brackets or a model designed specifically for horizontal openings.
Make sure the window is near an electrical outlet that matches the unit's voltage requirements. Most smaller models (up to roughly 12,000 BTU) run on a standard 115-volt outlet, while larger units may need a dedicated 230-volt circuit. Avoid using extension cords — they can overheat and become a serious fire hazard.

Choosing the Right Size & BTU Rating
An undersized air conditioner will struggle to cool your space, while an oversized one cycles on and off too frequently, wasting energy and leaving the air uncomfortably humid. Use the table below as a starting point to match your room's square footage to the correct BTU output.
| Room Size (sq. ft.) | Recommended BTU |
|---|---|
| 150 – 350 | 5,000 – 8,000 |
| 350 – 550 | 8,000 – 12,000 |
| 550 – 1,050 | 12,000 – 16,500 |
| 1,050 – 1,600 | 16,500 – 25,000 |
Keep in mind: Rooms with high ceilings, large sunny windows, or heat-generating appliances may need a unit rated slightly above these ranges.
Your Window Style Matters
Most window A/C units are engineered for standard double-hung windows, but models exist for casement, sliding, and even through-the-wall installations. Before purchasing, measure your window's opening width and height, then compare those numbers to the unit's specifications. If your window is non-standard, look for a model with an adjustable mounting kit or consider a through-the-wall sleeve for a cleaner, more permanent setup.
Energy Efficiency Tips
Not every window A/C is created equal when it comes to electricity consumption. When shopping, pay close attention to the unit's EER (Energy Efficiency Ratio) or the newer CEER (Combined Energy Efficiency Ratio). A higher number means the unit converts more of every watt into actual cooling. The U.S. Department of Energy requires all new room air conditioners to display an EnergyGuide label, making it simple to compare models side by side.
Look for the ENERGY STAR® certification — these models typically use at least 10 % less energy than the federal minimum standard. Over a full cooling season, that difference can translate into meaningful savings on your utility bill.
⚡ Pro Tip
Pair your window air conditioner with a programmable timer or a smart plug. Running the unit only when you are actually home can shave up to 30 % off your seasonal cooling costs — and many modern Wi-Fi-enabled models let you control schedules right from your phone.
Invest in the Right Unit
We stock a curated selection of high-performance window air conditioners designed for reliability, energy savings, and whisper-quiet operation. Whether you need a compact 5,000 BTU unit for a bedroom or a powerful 25,000 BTU system for an open living area, we have the right match for your space.
Step-by-Step Installation Walkthrough
Installing a window air conditioner is a manageable weekend task for most homeowners. Gather a screwdriver, a level, a measuring tape, and a helper to lift the unit into place. Then follow the steps below.
Step 1
Read the Owner's Manual
Before you touch a single screw, read the manual cover to cover. Every model has specific requirements for clearance, drainage, and electrical connections. The manual will also list every hardware piece included in the box — confirm that nothing is missing before you begin.
Step 2
Raise the Sash & Center the Unit
Lift the lower sash of your double-hung window as high as it will go. Set the air conditioner on the sill so that it sits centered in the opening. Most units should tilt very slightly toward the outside — about half an inch — so condensation drains away from the interior. Use a level to verify. Lower the sash snugly onto the top flange of the unit.
Step 3
Install the Mounting Brackets
Most kits include L-shaped brackets that secure the unit to the window sill or lower sash track. Drive the supplied screws through the bracket holes and into the sill. If your model includes an exterior support bracket, attach it to the outside wall beneath the unit according to the manufacturer's diagram — this provides critical extra support for heavier models.
Step 4
Extend the Side Panels & Seal the Gaps
Pull the accordion-style side curtains outward until they meet the window frame on both sides, then screw them in place. Apply weatherstrip foam tape along the top sash and any remaining gaps to create an airtight seal. Good sealing prevents warm outside air from leaking in and keeps insects out.
Step 5
Secure the Window Sash
Many units include a top-sash lock or an L-bracket that prevents the window from being opened from outside. Install it now — this is a simple but important security measure, especially for ground-floor installations. A sash lock also keeps the window from vibrating open over time.
Step 6
Plug In & Power Up
Connect the power cord directly to a wall outlet — no extension cords. Turn the unit on and set it to its highest fan speed for the first few minutes. Listen for unusual rattling (which may indicate loose panels) and confirm that cool air is flowing steadily. Adjust the thermostat to your preferred temperature and enjoy.
What to Know Before Uninstalling
Removing a window air conditioner at the end of the season is essentially the installation process in reverse, but a few precautions will protect both you and the unit.
1. Reverse the Installation
Unplug the unit first. Remove the sash lock, unscrew the side curtain brackets, and carefully pull the curtains inward. With a helper, lift the unit out of the window and set it on a protected surface inside.
2. Clean Off Debris & Dust
Wipe the exterior cabinet with a damp cloth, remove and wash the filter, and use a soft brush to clear dust from the condenser fins on the back. Allow every component to dry completely before storing.
3. Store Upright in a Dry Location
Place the air conditioner in its original box if you still have it, or cover it with a breathable cloth. Store it upright in a dry garage, basement, or closet. Avoid laying the unit on its side — the compressor oil can migrate into the refrigerant lines and cause problems when you start it up again next season.
Need more help choosing the perfect cooling solution? Backyard Provider is here to help — browse our full collection of window and wall air conditioners and find the ideal fit for your home.