


 Damage
  Loss
Loss  Theft
Theft 


8 Steps to Install a Mini Split Air Conditioner
Installing a mini split air conditioner is one of the smartest home investments you can make — and with the right preparation, it's a project that many capable homeowners can tackle themselves. This guide walks you through every stage of the process, from gathering your tools to powering on your unit for the first time.
8 Steps to Install a Ductless Mini Split
Follow these steps in sequence for a smooth, safe installation. Skipping steps can lead to refrigerant leaks, electrical hazards, or poor performance.

Select the Ideal Location for Both Units
The indoor air handler should be mounted high on an interior wall, away from direct sunlight and obstructions. The outdoor condenser needs at least 12 inches of clearance on all sides for proper airflow. Avoid placing either unit near heat sources, and ensure both locations are close enough for the refrigerant line set to reach comfortably.
Mount the Indoor Unit Bracket
Use a stud finder to locate solid mounting points. Secure the wall mounting plate level using a spirit level — even a slight tilt affects drainage and performance. Use appropriate anchors if studs aren't ideally positioned, ensuring the bracket can support the weight of the air handler securely.
Drill the Wall Penetration Hole
Using a hole saw (typically 3 inches in diameter), drill at a slight downward angle toward the exterior. This ensures condensate drains properly and prevents rainwater from entering. Insert the provided sleeve to protect the line set and wiring from the wall edges.
Route and Connect the Line Set
Carefully bend and thread the copper refrigerant lines, power cable, and drain hose through the wall opening together. Avoid kinking the copper tubing — use gentle, wide curves. Wrap the bundle with line set cover once connections are made to protect against UV and weather damage.

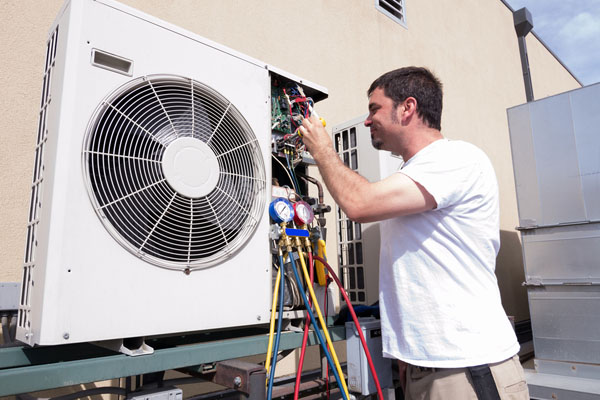
Connect Refrigerant Lines to Both Units
Flare the copper line ends if not pre-flared, then hand-tighten the flare nuts before finishing with a torque wrench to manufacturer specifications. Over-tightening damages the flare; under-tightening causes leaks. Connect the matching lines to the outdoor unit's service ports, keeping caps on until the last moment to prevent moisture contamination.
Wire the Electrical Connections
Mini splits require a dedicated circuit — confirm your breaker size matches the unit's electrical requirements. Connect the communication and power cables between the indoor and outdoor units exactly as shown in the wiring diagram. Double-check all terminal connections are secure and that no bare wires are exposed.
Vacuum the Refrigerant Lines
Connect a vacuum pump and manifold gauge set to pull a deep vacuum on the line set. Aim for 500 microns or lower — this removes all moisture and air from the system. Maintain the vacuum for at least 30 minutes, then perform a leak check by closing the valves and monitoring for pressure rise over 10 minutes.
Release Refrigerant and Power On
Once the vacuum holds, use an Allen key to open the service valves on the outdoor unit — this releases the pre-charged refrigerant into the system. Replace valve caps, restore power at the breaker, and power on the unit. Run both heating and cooling modes to confirm proper operation. Check for any unusual noises or vibrations.
Always cut power at the breaker panel before beginning any electrical work. Use a voltage tester to confirm the circuit is dead before touching any wires — never assume.
Never work with refrigerant without certification. In many regions, handling refrigerants without an EPA Section 608 certification is illegal and potentially dangerous.
Wear safety glasses and work gloves when drilling, cutting line sets, or working with the outdoor unit. Metal edges and debris are a common source of injury on HVAC installations.
Use a properly rated ladder and have a second person assist when mounting the indoor unit or working at height. Securing both the ladder and the unit prevents falls and drops.
Check local permits and codes before starting. Many municipalities require inspections for HVAC work, and unpermitted installations can affect home insurance and resale value.
How Much Does Installation Cost?
Total costs vary based on unit size, the number of zones, and whether you hire a professional. Here's a realistic breakdown to help you plan your budget before you begin.
Keep in mind that professional installation typically comes with a labor warranty and ensures the refrigerant charge is set correctly — something that's difficult to verify without professional-grade tools.
DIY Installation or Hire a Professional?
Both paths have merit depending on your skill level, budget, and the complexity of your installation. Consider the following before committing to either route.
DIY Installation
- Lower upfront cost
- Rewarding for hands-on homeowners
- Requires purchase or rental of tools
- Refrigerant work may need certification
- Risk of voiding unit warranty
- Permit requirements vary by location
Professional Installation
- Correct refrigerant charge guaranteed
- Labor warranty included
- Code compliance assured
- Faster completion time
- Higher upfront investment
- Peace of mind for first-time buyers
.webp)
How to Choose the Best Ductless Mini Split for Your Home
With dozens of models on the market, narrowing down the right unit starts with understanding your space and priorities. Here are the key factors to evaluate.
Room Size & BTU Rating
Match BTU capacity to square footage. A 12,000 BTU unit suits roughly 400–550 sq ft. Undersizing leads to inefficiency; oversizing causes short-cycling and humidity issues.
SEER2 Efficiency Rating
Higher SEER2 ratings mean lower monthly energy bills. Look for units rated 18+ SEER2 for the best balance of upfront cost and long-term savings.
Heating Capability
Heat pump models provide both heating and cooling year-round. Check the minimum operating temperature — some units work efficiently down to -22°F.
Single vs. Multi-Zone
Single-zone systems are simpler and more affordable. Multi-zone systems connect multiple indoor air handlers to one outdoor condenser for whole-home climate control.
Installation Type
Wall-mounted, ceiling cassette, floor console, and concealed duct models each suit different room layouts and aesthetic preferences. Consider your space before choosing.
Warranty & Support
Look for at minimum a 5-year parts warranty and 7-year compressor coverage. Domestic brand support and accessible service technicians matter when issues arise.
Ready to Take Control of Your Comfort?
Installing a mini split is one of the most effective upgrades you can make to any home, garage, or workspace. With the right unit, the right tools, and this guide in hand, you're fully equipped to get started. Whether you go DIY or bring in a pro, the result is a quieter, more efficient, and more comfortable space — year-round.
Frequently Asked Questions
Yes — a standard ductless mini split requires a 3-inch penetration hole through the wall to route the refrigerant line set, power cable, and condensate drain between the indoor and outdoor units. The hole is sealed after installation to prevent air infiltration.
Mini splits offer zoned comfort (heat or cool only the rooms you use), high energy efficiency, quiet operation, no ductwork losses, and the flexibility to heat and cool in a single system. They're ideal for additions, garages, older homes without existing ductwork, and new construction.
For cooling, 74–78°F is the recommended comfort range for most households. For heating, 68–72°F is typical. Avoid setting the unit below 60°F in cooling mode or running it at extreme settings continuously — this reduces efficiency and places unnecessary strain on the compressor.
A straightforward single-zone installation usually takes 4–8 hours for an experienced installer. DIY installations may take a full day or spread across a weekend, especially if it's your first time. Multi-zone systems with multiple indoor heads naturally require more time.
Modern inverter-driven heat pump mini splits are engineered to provide reliable heating even in extreme cold. Many high-performance models — including hyper-heat variants — maintain full heating output at temperatures as low as 5°F and can operate down to -22°F, making them suitable for most North American climates.