


How to Install Wine Guardian CS025 Ceiling Mount Cooling System
How to Install Wine Guardian CS025 Ceiling Mount Cooling System
Key Takeaways
- The Wine Guardian CS025 ceiling mount cooling system installation requires basic electrical knowledge, proper ceiling support structures, and specific tools including a stud finder, drill, and HVAC tape.
- For optimal performance, place the cooling unit centrally in your wine cellar with at least 12 inches of clearance above the unit and ensure proper drainage with a minimum 1/4-inch slope per linear foot.
- After installation, run the system for 24 hours to stabilize temperature and humidity levels before storing wine, and schedule professional maintenance checks every 6-12 months.
The Wine Guardian CS025 Ceiling Mount Cooling System
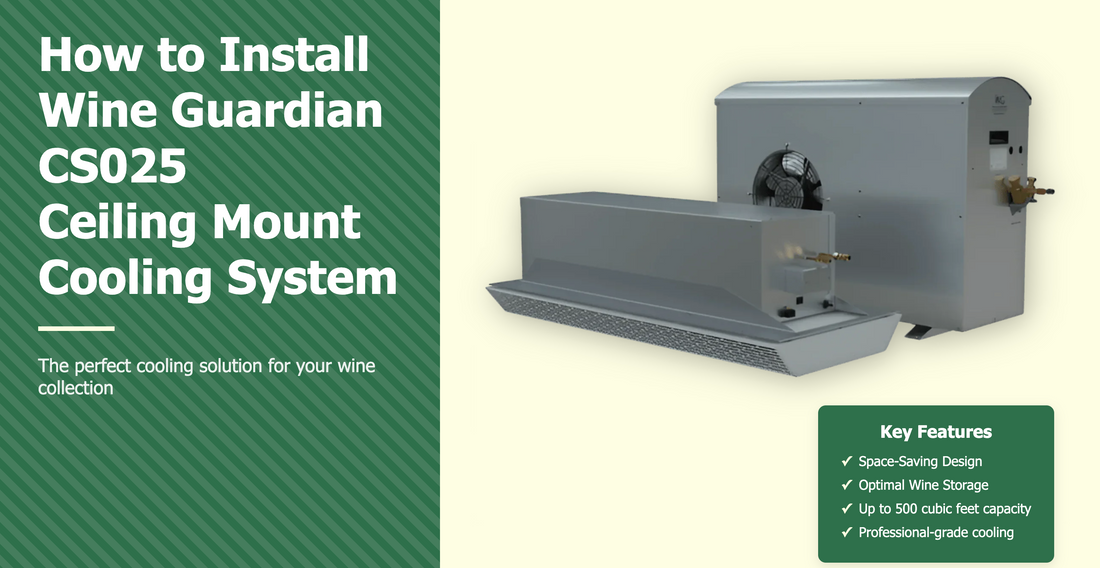
The Wine Guardian CS025 represents the perfect solution for wine enthusiasts with limited floor or wall space.

Wine Guardian CS025 Ceiling Mount Cooling System - 99H0368-10
This ceiling-mounted cooling system efficiently maintains optimal temperature and humidity levels while remaining discreetly positioned above your collection. Its compact design makes it ideal for residential wine cellars up to 500 cubic feet, delivering professional-grade cooling without compromising your cellar aesthetics.
This comprehensive guide walks you through the entire installation process of the Wine Guardian CS025 ceiling mount system. While professional installation is recommended, this step-by-step approach gives you clear insights into the requirements, preparation, and techniques needed for a successful installation.
"Proper installation creates the foundation for reliable operation, but ongoing maintenance sustains performance over time."
| Specification | Wine Guardian CS025 Details |
|---|---|
| Cooling Capacity | 1,470 BTU/h (nominal) |
| Dimensions | 33.5" L × 14.25" W × 14" H |
| Weight | 65 lbs (29.5 kg) |
| Electrical Requirements | 115V/1ph/60Hz or 230V/1ph/50Hz |
| Recommended Room Size | Up to 500 cubic feet (well-insulated) |
Pre-Installation Requirements and Planning
Tools and Materials Needed
Before diving into your Wine Guardian CS025 installation, gathering all necessary tools and materials will save you time and frustration. A successful installation requires both general construction tools and specific HVAC equipment.
Essential Tools:
• Drill and drill bits
• Level (laser level preferred)
• Stud finder
• Measuring tape
• Screwdriver set
• Wire cutters/strippers
• Utility knife
Materials Required:
• Mounting brackets (included)
• Screws and anchors
• Electrical wire and conduit
• HVAC foil tape
• Condensate drain line
• Pipe insulation
• Silicone sealant
For ceiling-mounted installations, you might also need lifting equipment or an assistant to help position the unit safely. The Wine Guardian CS025 weighs approximately 65 pounds, making it manageable for two people but challenging for a single installer.
Site Assessment and Preparation
A thorough site assessment ensures your ceiling mount cooling system installation proceeds smoothly. First, evaluate your ceiling structure to verify it can support the 65-pound unit. Look for solid ceiling joists, ideally 16 inches on center, that align with the mounting brackets. If your ceiling construction differs, you may need to install additional support structures.
Next, examine the electrical supply. The CS025 requires a dedicated 115V/60Hz circuit with proper grounding. This dedicated circuit prevents power fluctuations that could damage the unit or affect its performance. If your electrical panel cannot accommodate another circuit, consult an electrician before proceeding.
Clearance requirements represent another critical factor. The Wine Guardian CS025 needs at least 12 inches of clearance above the unit for proper ventilation and service access. Additionally, ensure the installation location allows for proper condensate drainage with at least a 1/4-inch slope per linear foot away from the unit.
Professional Tip
Before finalizing your installation location, take detailed measurements and create a paper template of the unit's footprint. Tape this template to your ceiling to visualize the placement and verify clearances without struggling with the actual unit.
Optimal Placement Strategies
Strategic placement of your Wine Guardian CS025 maximizes cooling efficiency while minimizing energy consumption. The ideal location centers the unit in your wine cellar, allowing for even air distribution throughout the space. This central positioning ensures no "hot spots" develop in corners or alcoves that could affect wine quality.
Consider airflow patterns when determining placement. The CS025 draws air from below, cools it, then discharges it horizontally. Position the unit so its discharge doesn't blow directly onto wine racks or create uncomfortable drafts. Maintain at least 3 feet of clearance between the discharge grille and any obstruction.
"Strategic placement of your Wine Guardian CS025 maximizes cooling efficiency while minimizing energy consumption."
Noise concerns should also factor into your placement decision. While the Wine Guardian CS025 operates quietly compared to many cooling systems, placing it directly above seating areas might create a subtle but noticeable background noise during operation. Consider positioning it above less frequently occupied areas if noise sensitivity is a concern.
Step-by-Step Installation Process
Mounting the Unit
The mounting process requires precision and attention to detail to ensure secure installation of your Wine Guardian CS025. Begin by unpacking the unit and inspecting all components for shipping damage. The package should include the main cooling unit, mounting brackets, remote thermostat, and installation hardware.
"The Wine Guardian CS025 represents the perfect solution for wine enthusiasts with limited floor or wall space."
Mounting Procedure:
- Locate ceiling joists: Using a stud finder, identify and mark the ceiling joists where you'll mount the unit. The CS025 requires secure attachment to structural elements, not just drywall.
- Position mounting brackets: Hold the mounting brackets against the ceiling at your marked locations. Ensure they're level using a laser level or spirit level, then mark the screw hole positions.
- Secure brackets: Drill pilot holes at your marked positions, then attach the mounting brackets using the provided lag bolts. Verify the brackets are firmly secured and can support the unit's weight.

After securing the mounting brackets, prepare to lift the unit into position. This step typically requires two people—one to lift and hold the unit while the other aligns and secures it to the brackets. Position the unit so its threaded mounting holes align with the slots in the brackets.
"For optimal performance, place the cooling unit centrally in your wine cellar with at least 12 inches of clearance above the unit."
❞Insert the mounting bolts through the bracket slots into the unit's threaded holes. Tighten them partially, allowing for minor adjustments to ensure the unit is level in all directions. Once properly positioned, fully tighten all mounting bolts to secure the unit firmly against the brackets.
Finally, verify the installation is level and secure by checking with a spirit level in multiple directions. The unit should not rock or shift when gently pushed. If necessary, loosen the mounting bolts slightly to make fine adjustments, then retighten them securely.
Electrical Connections
Proper electrical installation ensures safe and reliable operation of your Wine Guardian CS025. Always disconnect power at the circuit breaker before beginning any electrical work. If you're uncomfortable with electrical connections, hire a licensed electrician for this portion of the installation.
The CS025 requires connection to a dedicated 15-amp circuit. Begin by routing appropriately sized electrical conduit from your electrical panel to the unit's location. Pull the required conductors through the conduit—typically two insulated conductors (one black, one white) and one bare copper ground wire for 115V installations.
At the unit, locate the electrical junction box and remove its cover. Inside, you'll find labeled terminals for line (L1), neutral (N), and ground (G) connections. Strip approximately 1/2 inch of insulation from the ends of your conductors, then connect them to the appropriate terminals: black wire to L1, white wire to N, and bare copper wire to G.
Safety Warning
Never attempt to modify the Wine Guardian CS025's electrical system to accommodate different voltage requirements. The unit is factory-configured for either 115V or 230V operation and requires professional service if conversion is needed.
After securing all electrical connections, replace the junction box cover. Double-check that all connections are tight and that no bare conductors are exposed. Before restoring power, verify that the unit's control switch is in the OFF position to prevent unexpected startup.
Condensate Drain Installation
Proper condensate drainage prevents water damage and maintains optimal humidity levels in your wine cellar. The Wine Guardian CS025 includes a condensate drain connection that requires careful installation to ensure effective operation.
Start by locating the condensate drain outlet on the unit—typically a 1/2-inch PVC fitting. Attach the provided drain line to this outlet, ensuring a tight connection. If the provided drain line isn't long enough to reach your intended drainage point, use 1/2-inch PVC pipe or clear vinyl tubing to extend it.
The condensate line must maintain a continuous downward slope of at least 1/4 inch per linear foot to ensure proper drainage. Any sags or upward bends in the line will trap water and prevent effective drainage. Route the line to a suitable drain location such as a floor drain, utility sink, or condensate pump.
For optimal performance, insulate the entire condensate line with foam pipe insulation. This prevents condensation from forming on the outside of the pipe, which could drip in unwanted areas. Secure all joints with appropriate adhesive or HVAC tape to prevent leaks.
After installation, test the drainage system by pouring a small amount of water into the unit's drain pan. Watch carefully to ensure water flows freely through the entire line without leaking at any joints. If you notice any issues, correct them immediately before proceeding with the installation.
Setting Up Controls and Thermostat
Thermostat Placement and Wiring
The Wine Guardian CS025 includes a sophisticated remote thermostat that monitors both temperature and humidity. Proper placement of this thermostat ensures accurate readings and optimal system performance. Mount the thermostat at eye level (approximately 60 inches from the floor) on an interior wall of your wine cellar.
Avoid locations that might skew temperature readings, such as areas near doors, windows, light fixtures, or direct sunlight. Also maintain distance from wine racks to prevent bottles from influencing the thermostat readings. The ideal location provides a representative sample of the cellar's overall environment.
To connect the thermostat, run the provided communication cable from the thermostat location to the main unit. This low-voltage cable can typically be routed along baseboards or through walls without requiring conduit. At the unit, locate the terminal block labeled for thermostat connections and attach the cable according to the color-coded wiring diagram in the installation manual.
At the thermostat location, mount the back plate using the provided screws. Connect the communication cable to the thermostat's terminal block, matching wire colors to their designated terminals. Finally, attach the thermostat face to the mounted back plate, ensuring it clicks securely into place.
Control System Configuration
Configuring the Wine Guardian CS025's control system establishes optimal operating parameters for your specific wine cellar. After powering on the system, the thermostat display should illuminate, indicating successful connection. Press and hold the Settings button for five seconds to enter the configuration menu.
| Parameter | Recommended Setting | Notes |
|---|---|---|
| Temperature Set Point | 55°F (13°C) | Standard wine storage temperature |
| Temperature Differential | 2°F (1°C) | How much temperature can vary before system activates |
| Humidity Set Point | 60% RH | Ideal cork moisture level |
| Humidity Differential | 5% RH | Activation range for humidity control |
| Temperature Display | °F or °C | Based on user preference |
Navigate through configuration options using the Up and Down arrows, and press Select to modify each parameter. After setting all parameters according to your preferences, press and hold the Settings button again to exit configuration mode and save your settings.
The Wine Guardian CS025 also offers advanced configuration options accessible through a separate service menu. These parameters control fan speeds, defrost cycles, and alarm thresholds. Unless you're experiencing specific performance issues, leave these advanced settings at their factory defaults.
Wine Storage Tip
Different wine varieties benefit from slightly different storage temperatures. Consider setting your Wine Guardian CS025 to accommodate your primary collection. Red wines generally store well at 55-65°F (13-18°C), while white wines prefer slightly cooler temperatures of 45-55°F (7-13°C).
Testing and Troubleshooting
Initial System Testing
After completing all installation steps, thorough testing ensures your Wine Guardian CS025 functions properly before you rely on it to protect your wine collection. Begin by verifying electrical connections by turning on power at the circuit breaker. The thermostat should illuminate, indicating it's receiving power.
Set the thermostat to "Cool" mode and adjust the temperature set point several degrees below the current room temperature. Within a few minutes, the compressor should activate, and you should feel cool air flowing from the supply grilles. If the system doesn't start, check the thermostat settings and electrical connections.
Test the condensate drainage system by pouring water slowly into the drain pan. Watch to ensure water flows freely through the drain line without leaking at connections. If water doesn't drain properly, check for proper slope and clear any blockages in the line.
Monitor the system through a complete cooling cycle, listening for unusual noises that might indicate mounting problems or internal issues. The unit should operate smoothly with minimal vibration. If you notice excessive noise or vibration, check mounting bolts and ensure the unit is properly secured.
Common Installation Issues and Solutions
Despite careful installation, you might encounter certain issues with your Wine Guardian CS025. Here are common problems and their solutions:
| Problem | Possible Causes | Solutions |
|---|---|---|
| Unit doesn't power on | • No power to circuit • Disconnected wiring • Blown fuse |
• Check circuit breaker • Inspect all electrical connections • Check internal fuse |
| Insufficient cooling | • Improper thermostat settings • Airflow restrictions • Refrigerant issues |
• Verify temperature settings • Check for blocked vents • Contact technician for refrigerant check |
| Water leakage | • Improper drain slope • Disconnected drain line • Clogged drain |
• Re-slope drain line • Secure all drain connections • Clear blockages |
| Excessive noise | • Loose mounting • Debris in fan • Internal component issue |
• Tighten mounting hardware • Clean fan blades • Contact technical support |
| Thermostat communication error | • Damaged communication cable • Improper wiring • Thermostat malfunction |
• Inspect cable for damage • Verify correct terminal connections • Reset or replace thermostat |
If you encounter persistent issues that you cannot resolve through basic troubleshooting, contact Wine Guardian's technical support. Their specialists can provide guidance specific to your installation and may help identify problems requiring professional service.
Maintenance and Ongoing Care
Regular Maintenance Schedule
Proper maintenance ensures your Wine Guardian CS025 provides years of reliable service. Establish a regular maintenance schedule based on these recommended intervals:
Maintenance Timeline:
Monthly Tasks: Check air filters and clean or replace as needed. Inspect the condensate drain line for proper drainage and clear any obstructions. Verify thermostat readings against an independent thermometer/hygrometer for accuracy.
Quarterly Tasks: Clean evaporator and condenser coils to remove dust and debris that could restrict airflow. Check all electrical connections for tightness and signs of wear. Inspect mounting hardware to ensure the unit remains securely attached.
Annual Tasks: Schedule professional service to check refrigerant levels, test system performance, and perform comprehensive inspection. Replace air filters even if they appear clean, as microscopic particles can restrict airflow without visible buildup.

During each maintenance session, power off the unit and remove the access panels to inspect internal components. Look for signs of wear, loose connections, or water damage that might indicate developing problems. Address any issues immediately to prevent system failure and potential damage to your wine collection.
Keep a maintenance log documenting each service date and the work performed. This record helps track the unit's history and may prove valuable for warranty claims or troubleshooting recurring issues. Store the log along with your Wine Guardian owner's manual and warranty information for easy reference.
Expert Recommendation
Consider scheduling professional maintenance for your Wine Guardian CS025 twice yearly—once before summer when cooling demands increase, and again before winter when humidity control becomes more challenging. This proactive approach prevents seasonal performance issues.
Filter Replacement and Cleaning
Air filters represent one of the most critical maintenance items for your Wine Guardian CS025. Clean filters ensure proper airflow, optimal cooling performance, and protection for internal components. The CS025 typically uses a washable filter that can be cleaned rather than replaced when it becomes dirty.
To access the filter, locate the filter access panel on the unit's underside. Remove the panel by loosening the securing screws or clips, then slide the filter out carefully. Hold it up to a light source—if you cannot see light passing through, the filter requires cleaning.
Wash the filter using mild soap and warm water, gently agitating to remove dust and debris. Rinse thoroughly and allow to dry completely before reinstallation. Never reinstall a damp filter, as this can promote mold growth within the system and reduce filtration efficiency.
If the filter shows signs of damage, such as tears, holes, or breakdown of the filter material, replace it with a genuine Wine Guardian replacement filter. Using aftermarket or generic filters may compromise system performance and potentially void your warranty coverage.
Mark your calendar to check filters monthly, especially in dusty environments or seasons with high pollen counts. Consistently clean filters can improve energy efficiency by up to 15% compared to systems operating with clogged filtration.
Optimizing Wine Cellar Environment
Fine-Tuning Temperature and Humidity
After installing your Wine Guardian CS025, fine-tuning the environmental settings optimizes conditions for your specific wine collection. While the standard recommendation of 55°F (13°C) and 60% relative humidity works well for most collections, your particular wines may benefit from customized temperature and humidity control settings.
Red wines generally store best between 55-65°F (13-18°C), while white wines prefer slightly cooler temperatures of 45-55°F (7-13°C). If your collection includes both types, consider setting the temperature around 55°F as a compromise. Dessert wines and champagnes may require even cooler storage, potentially as low as 45°F (7°C).
"Different wine varieties benefit from slightly different storage temperatures, with reds preferring 55-65°F and whites thriving at 45-55°F."
Humidity control proves equally important for proper wine storage. Too little humidity (below 50%) can dry out corks, leading to oxygen exposure and wine spoilage. Excessive humidity (above 70%) might damage labels and encourage mold growth. The Wine Guardian CS025's humidity control feature maintains optimal conditions when properly configured.
For collections with special requirements or particularly valuable bottles, consider installing secondary temperature and humidity monitors at different locations throughout your cellar. These independent readings help verify the accuracy of your thermostat and identify any environmental stratification that might affect wine quality.
| Wine Type | Ideal Temperature | Ideal Humidity |
|---|---|---|
| Full-bodied Reds | 60-65°F (15-18°C) | 60-65% RH |
| Light Reds | 55-60°F (13-15°C) | 60-65% RH |
| White Wines | 50-55°F (10-13°C) | 55-60% RH |
| Sparkling Wines | 45-50°F (7-10°C) | 55-60% RH |
| Dessert Wines | 45-50°F (7-10°C) | 60-65% RH |
Energy Efficiency Considerations
While protecting your wine collection remains the primary goal, optimizing your Wine Guardian CS025's energy efficiency reduces operating costs without compromising performance. Several strategies can enhance efficiency after installation.
First, ensure your wine cellar has adequate insulation. Proper insulation reduces the cooling load on your system, allowing it to cycle less frequently and consume less energy. Pay particular attention to insulation around doors, windows, and ceiling penetrations where thermal leakage commonly occurs.
Consider installing a timer or smart control system that adjusts temperature settings based on usage patterns. For example, if your cellar serves as both storage and tasting area, program slightly warmer temperatures during planned tasting sessions, then return to optimal storage conditions afterward.
Organize your wine collection to promote efficient air circulation. Avoid blocking supply or return air grilles with wine racks or furniture. Leave at least 6 inches of clearance around all air circulation points to prevent airflow restrictions that force the system to work harder.
Finally, minimize door openings to reduce the infiltration of warm, humid air that increases cooling demand. Consider installing a glass viewing door that allows you to survey your collection without opening the cellar. If frequent access is necessary, install a vestibule or small anteroom that creates an air lock between your cellar and the surrounding environment.
Energy-Saving Tip
Schedule major cellar activities like restocking or reorganizing during cooler morning hours when the ambient temperature difference is minimized. This reduces the cooling load on your Wine Guardian CS025 and conserves energy during peak rate periods.
Conclusion
Installing the Wine Guardian CS025 ceiling mount cooling system represents a significant investment in protecting and preserving your wine collection. This comprehensive guide has walked you through each installation step, from initial planning to final testing and optimization. While the process requires attention to detail and some technical knowledge, careful adherence to these guidelines ensures a successful installation.
Remember that proper installation creates the foundation for reliable operation, but ongoing maintenance sustains performance over time. Regular filter cleaning, condensate system inspection, and professional service keep your Wine Guardian CS025 operating at peak efficiency while extending its service life. The modest time investment in maintenance pays dividends in consistent temperature and humidity control for your valuable wines.
Whether you've tackled this installation yourself or worked alongside a professional HVAC technician, understanding the system's operation helps you recognize potential issues before they affect your collection. The Wine Guardian CS025's ceiling-mounted design maximizes available space while providing the precise environmental control fine wines require.
"The Wine Guardian CS025 ceiling-mounted design maximizes available space while providing the precise environmental control fine wines require."
With your Wine Guardian CS025 properly installed and configured, you can enjoy the peace of mind that comes from knowing your wine collection ages in optimal conditions, protected from temperature fluctuations and humidity variations that might compromise quality and value.